> ## Documentation Index
> Fetch the complete documentation index at: https://docs.paradime.io/llms.txt
> Use this file to discover all available pages before exploring further.
# Amazon Quick
This guide is about how to setup Paradime MCP remote server for Amazon Quick. Amazon Quick does not support Dynamic Client Registration (DCR) and Well-known URI discovery uses the server root path only. Path-specific metadata locations (path-insertion discovery) are not supported.
As a result, we have to follow a different setup approach explained below.
#### Step 1 - Generate an MCP Token in Paradime
In Paradime, navigate to [https://app.paradime.io/settings/api-keys](https://app.paradime.io/settings/api-keys) and generate an MCP token and note the MCP endpoint and the PAT token and keep them saved in a safe place, as you won't be able to see it again.
#### Step 2 - Create a MCP Connection in Amazon Quick
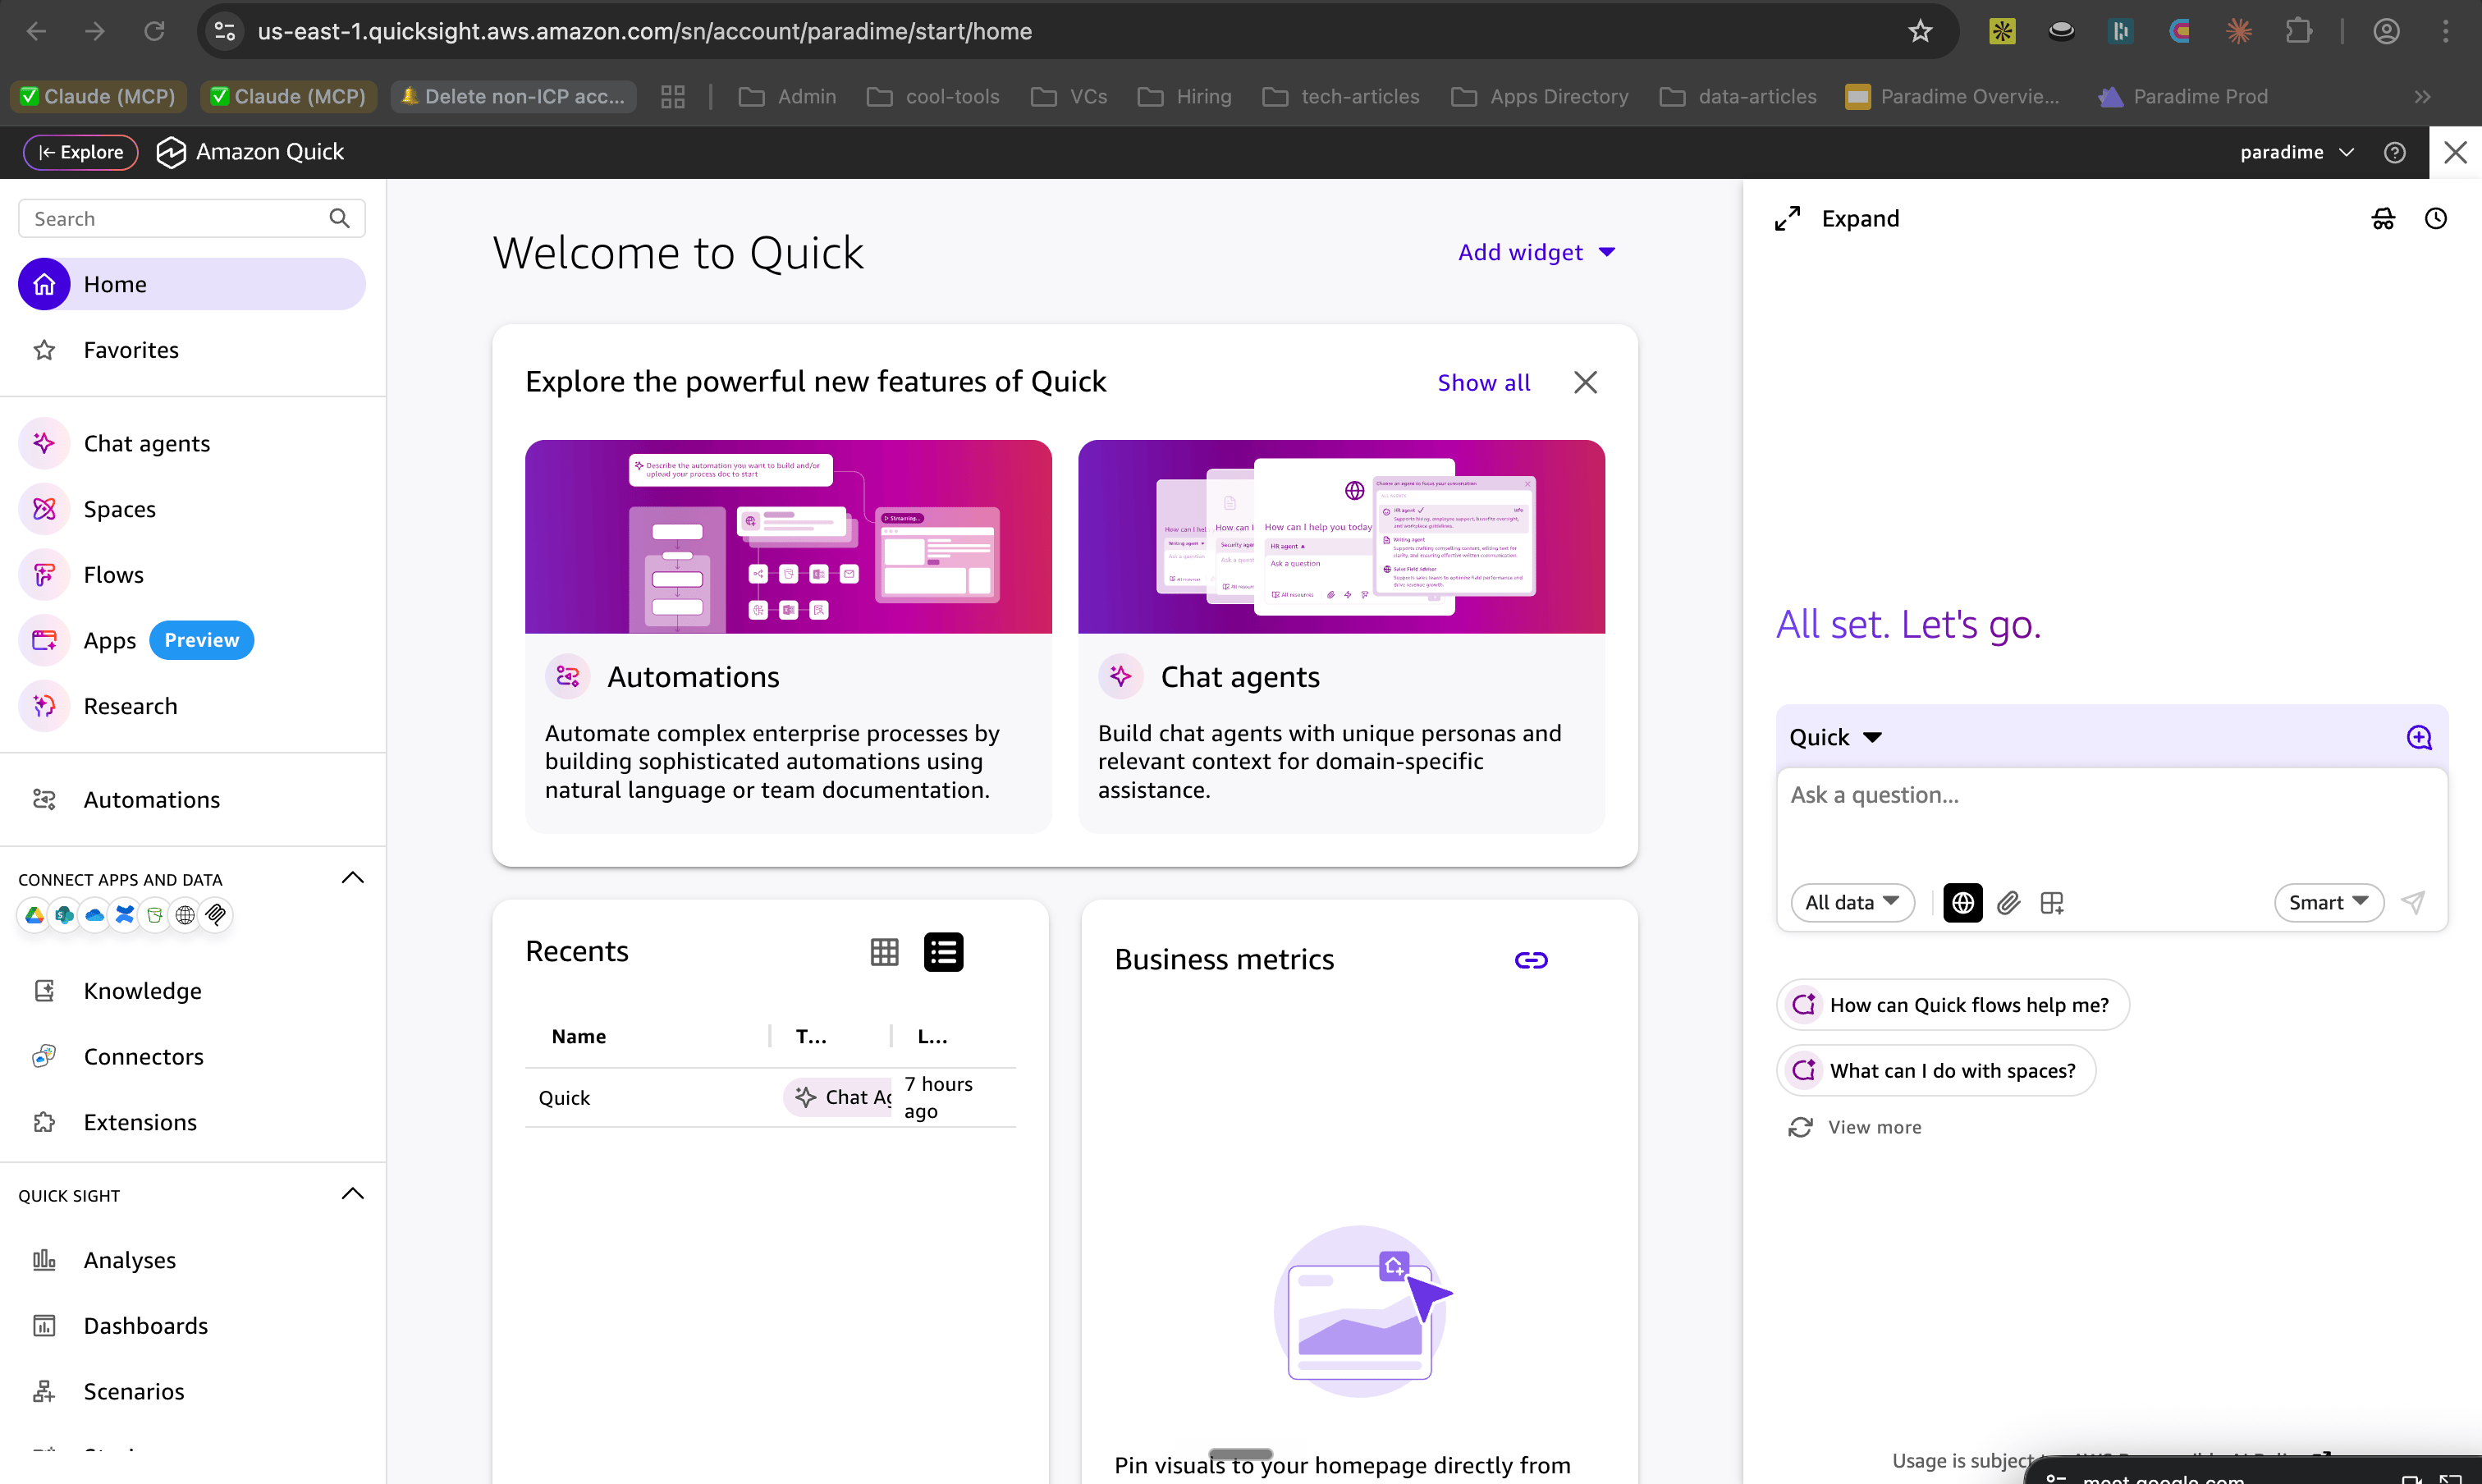
Navigate to the Amazon Quick homepage and click on "Connectors" on the left panel.
 #### Step 3 - Create Model Context Protocol connector
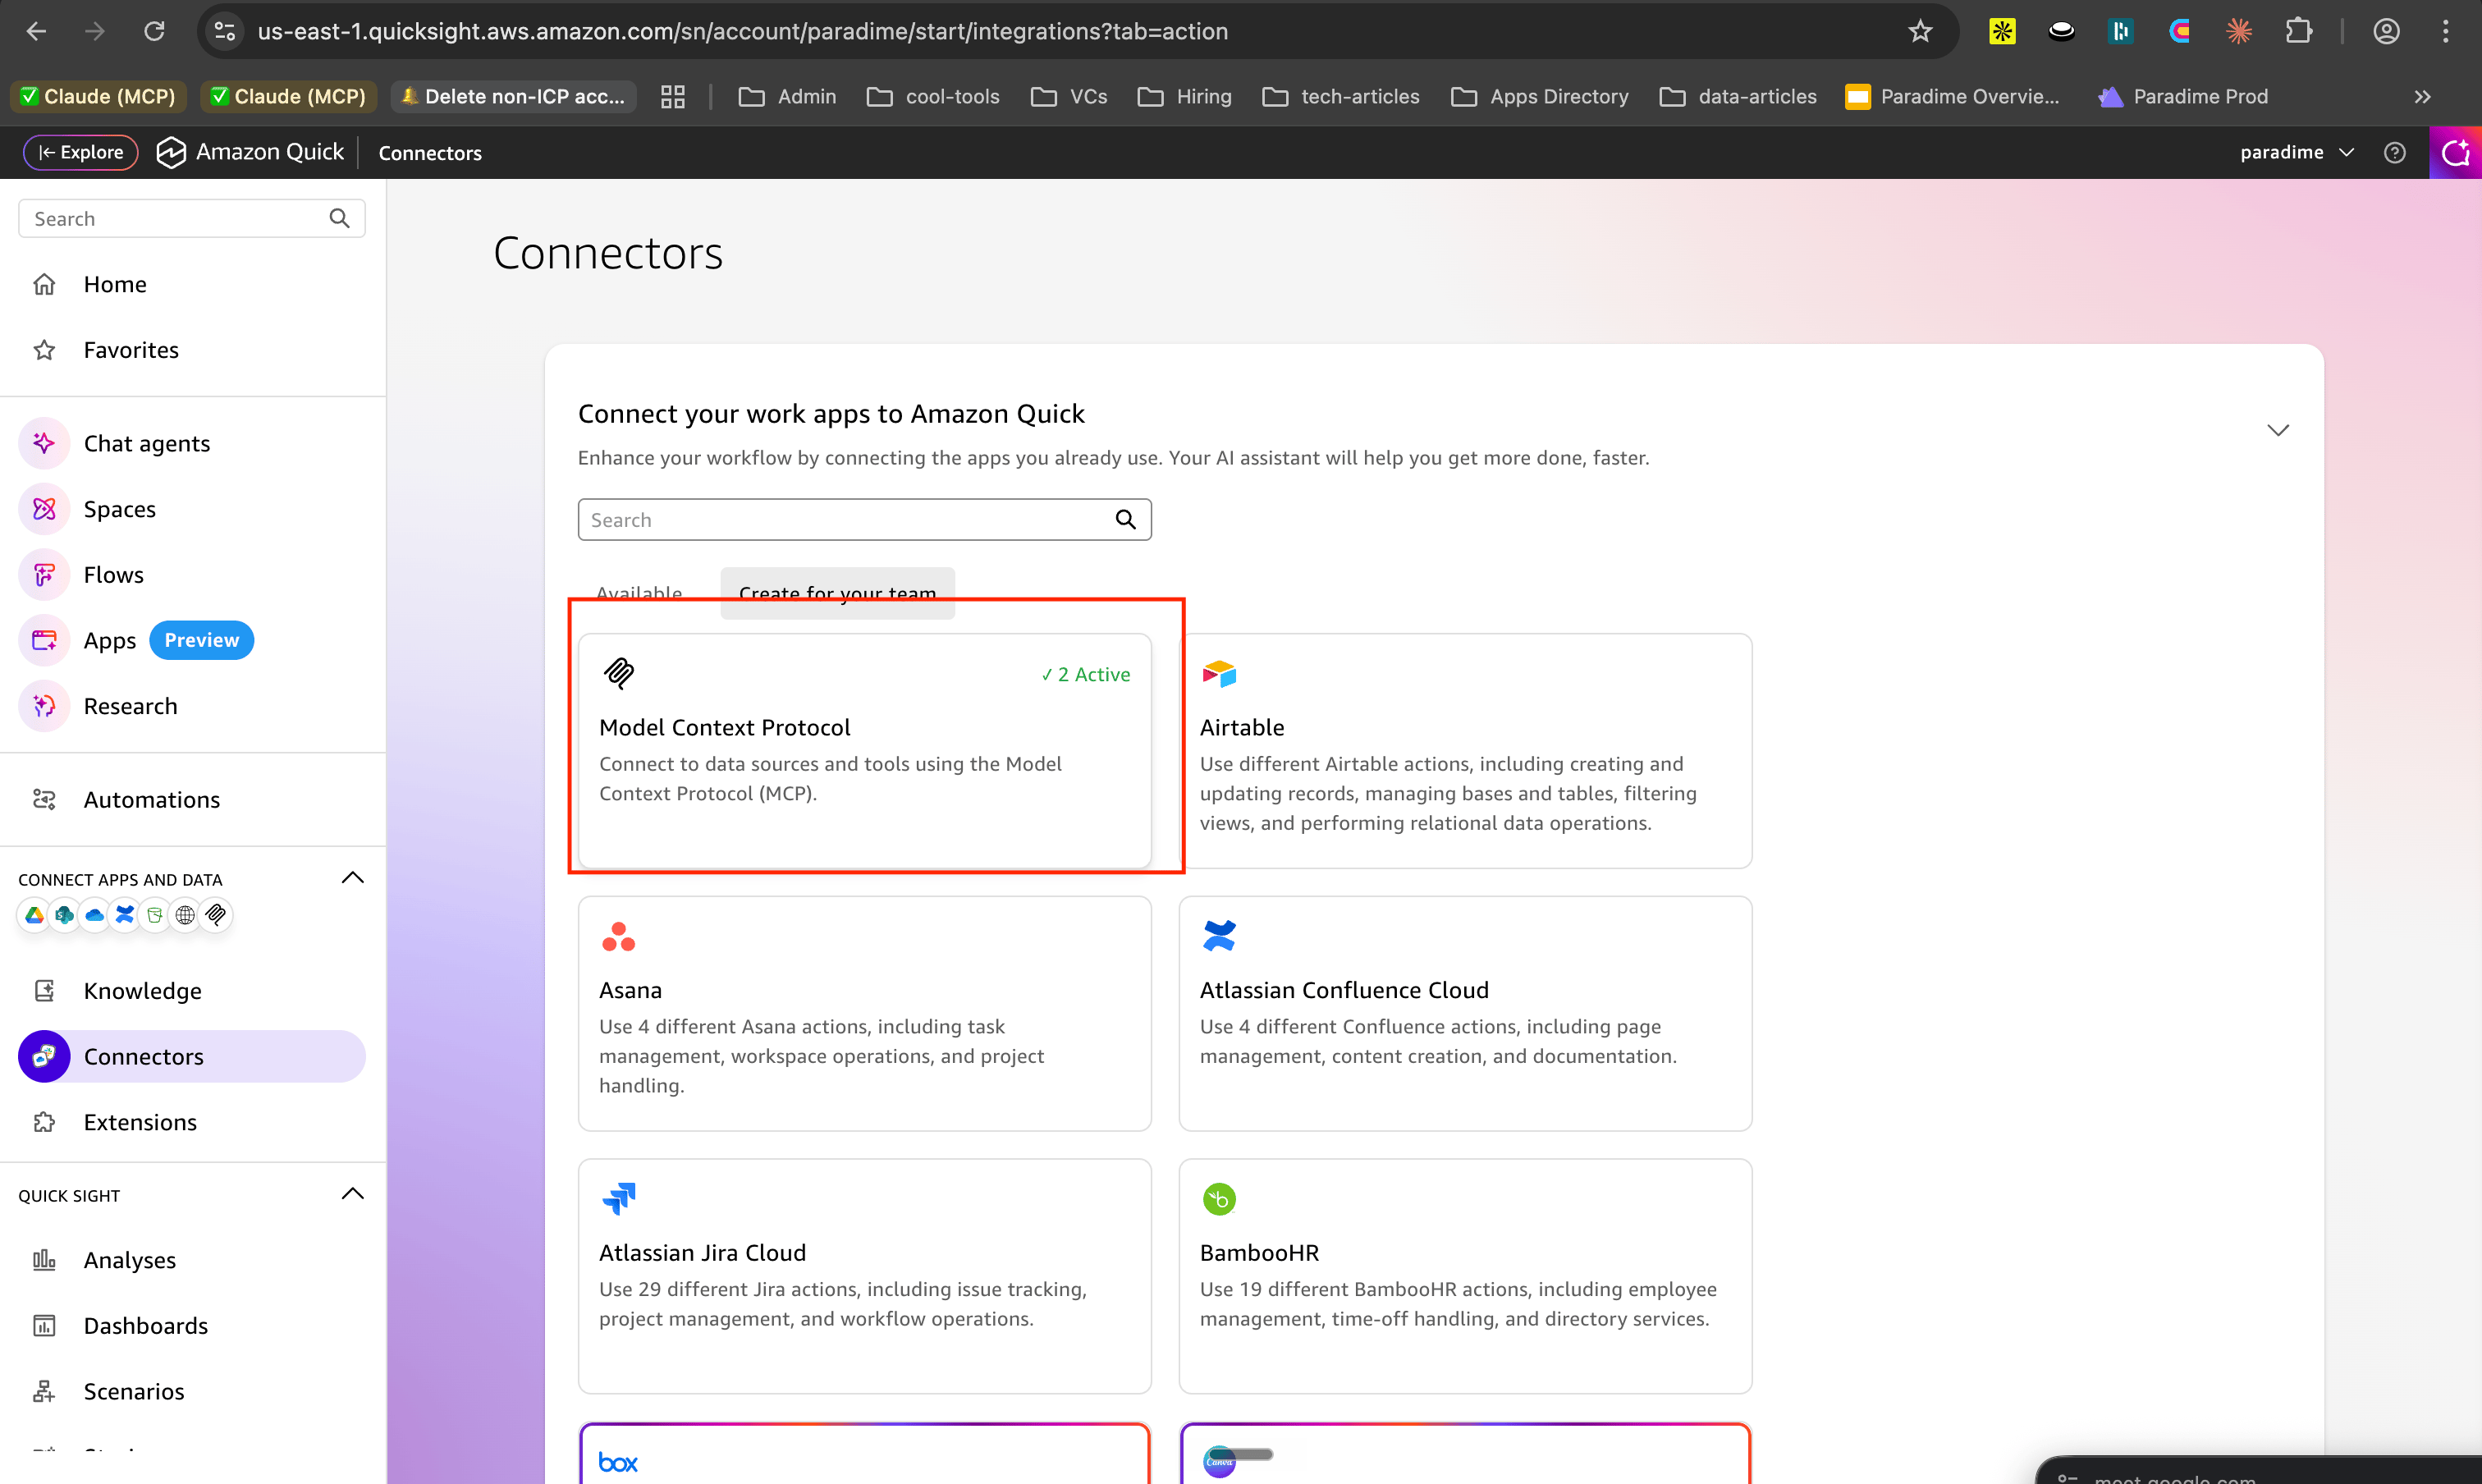
Navigate to Connectors -> Create for your team
#### Step 3 - Create Model Context Protocol connector
Navigate to Connectors -> Create for your team
 #### Step 4 - Setup a Paradime MCP
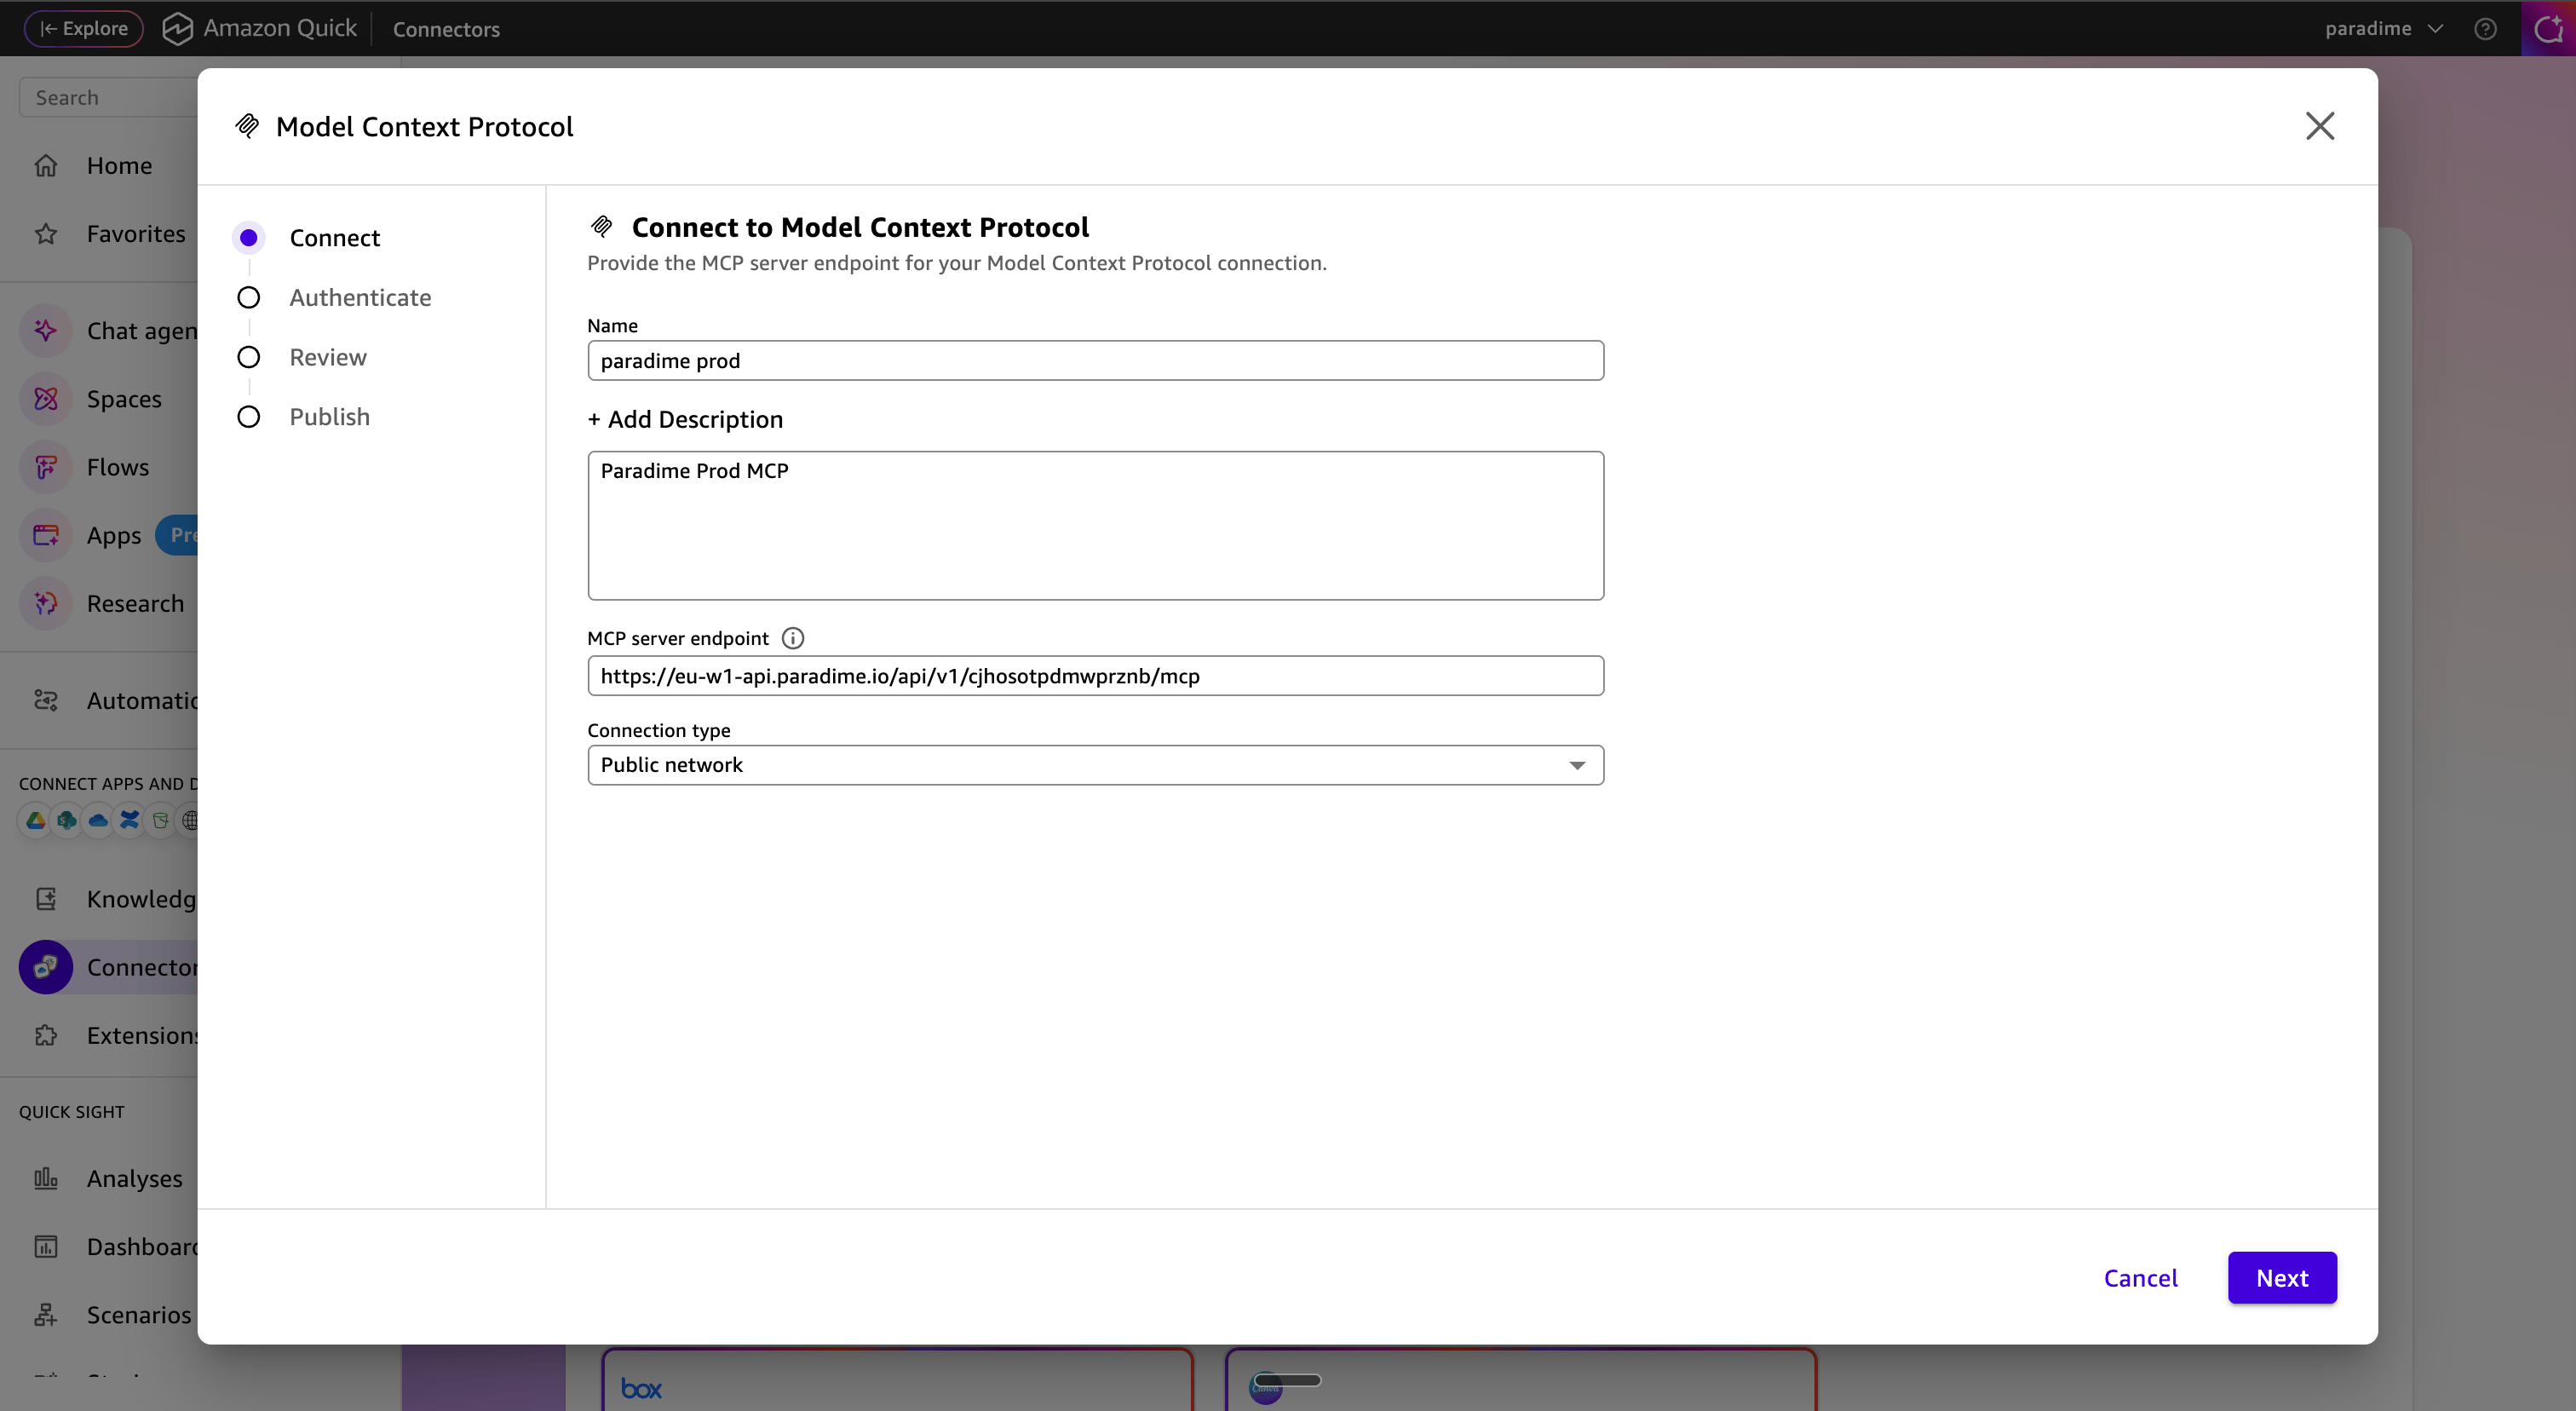
Enter a name for the MCP, and add the MCP endpoint url that we got from Step-1, and click Next
#### Step 4 - Setup a Paradime MCP
Enter a name for the MCP, and add the MCP endpoint url that we got from Step-1, and click Next
 #### Step 5 - Add Authentication Details
Visit the following URL to get your connection details:
`/setup` and click **Generate Configuration**
#### Step 5 - Add Authentication Details
Visit the following URL to get your connection details:
`/setup` and click **Generate Configuration**
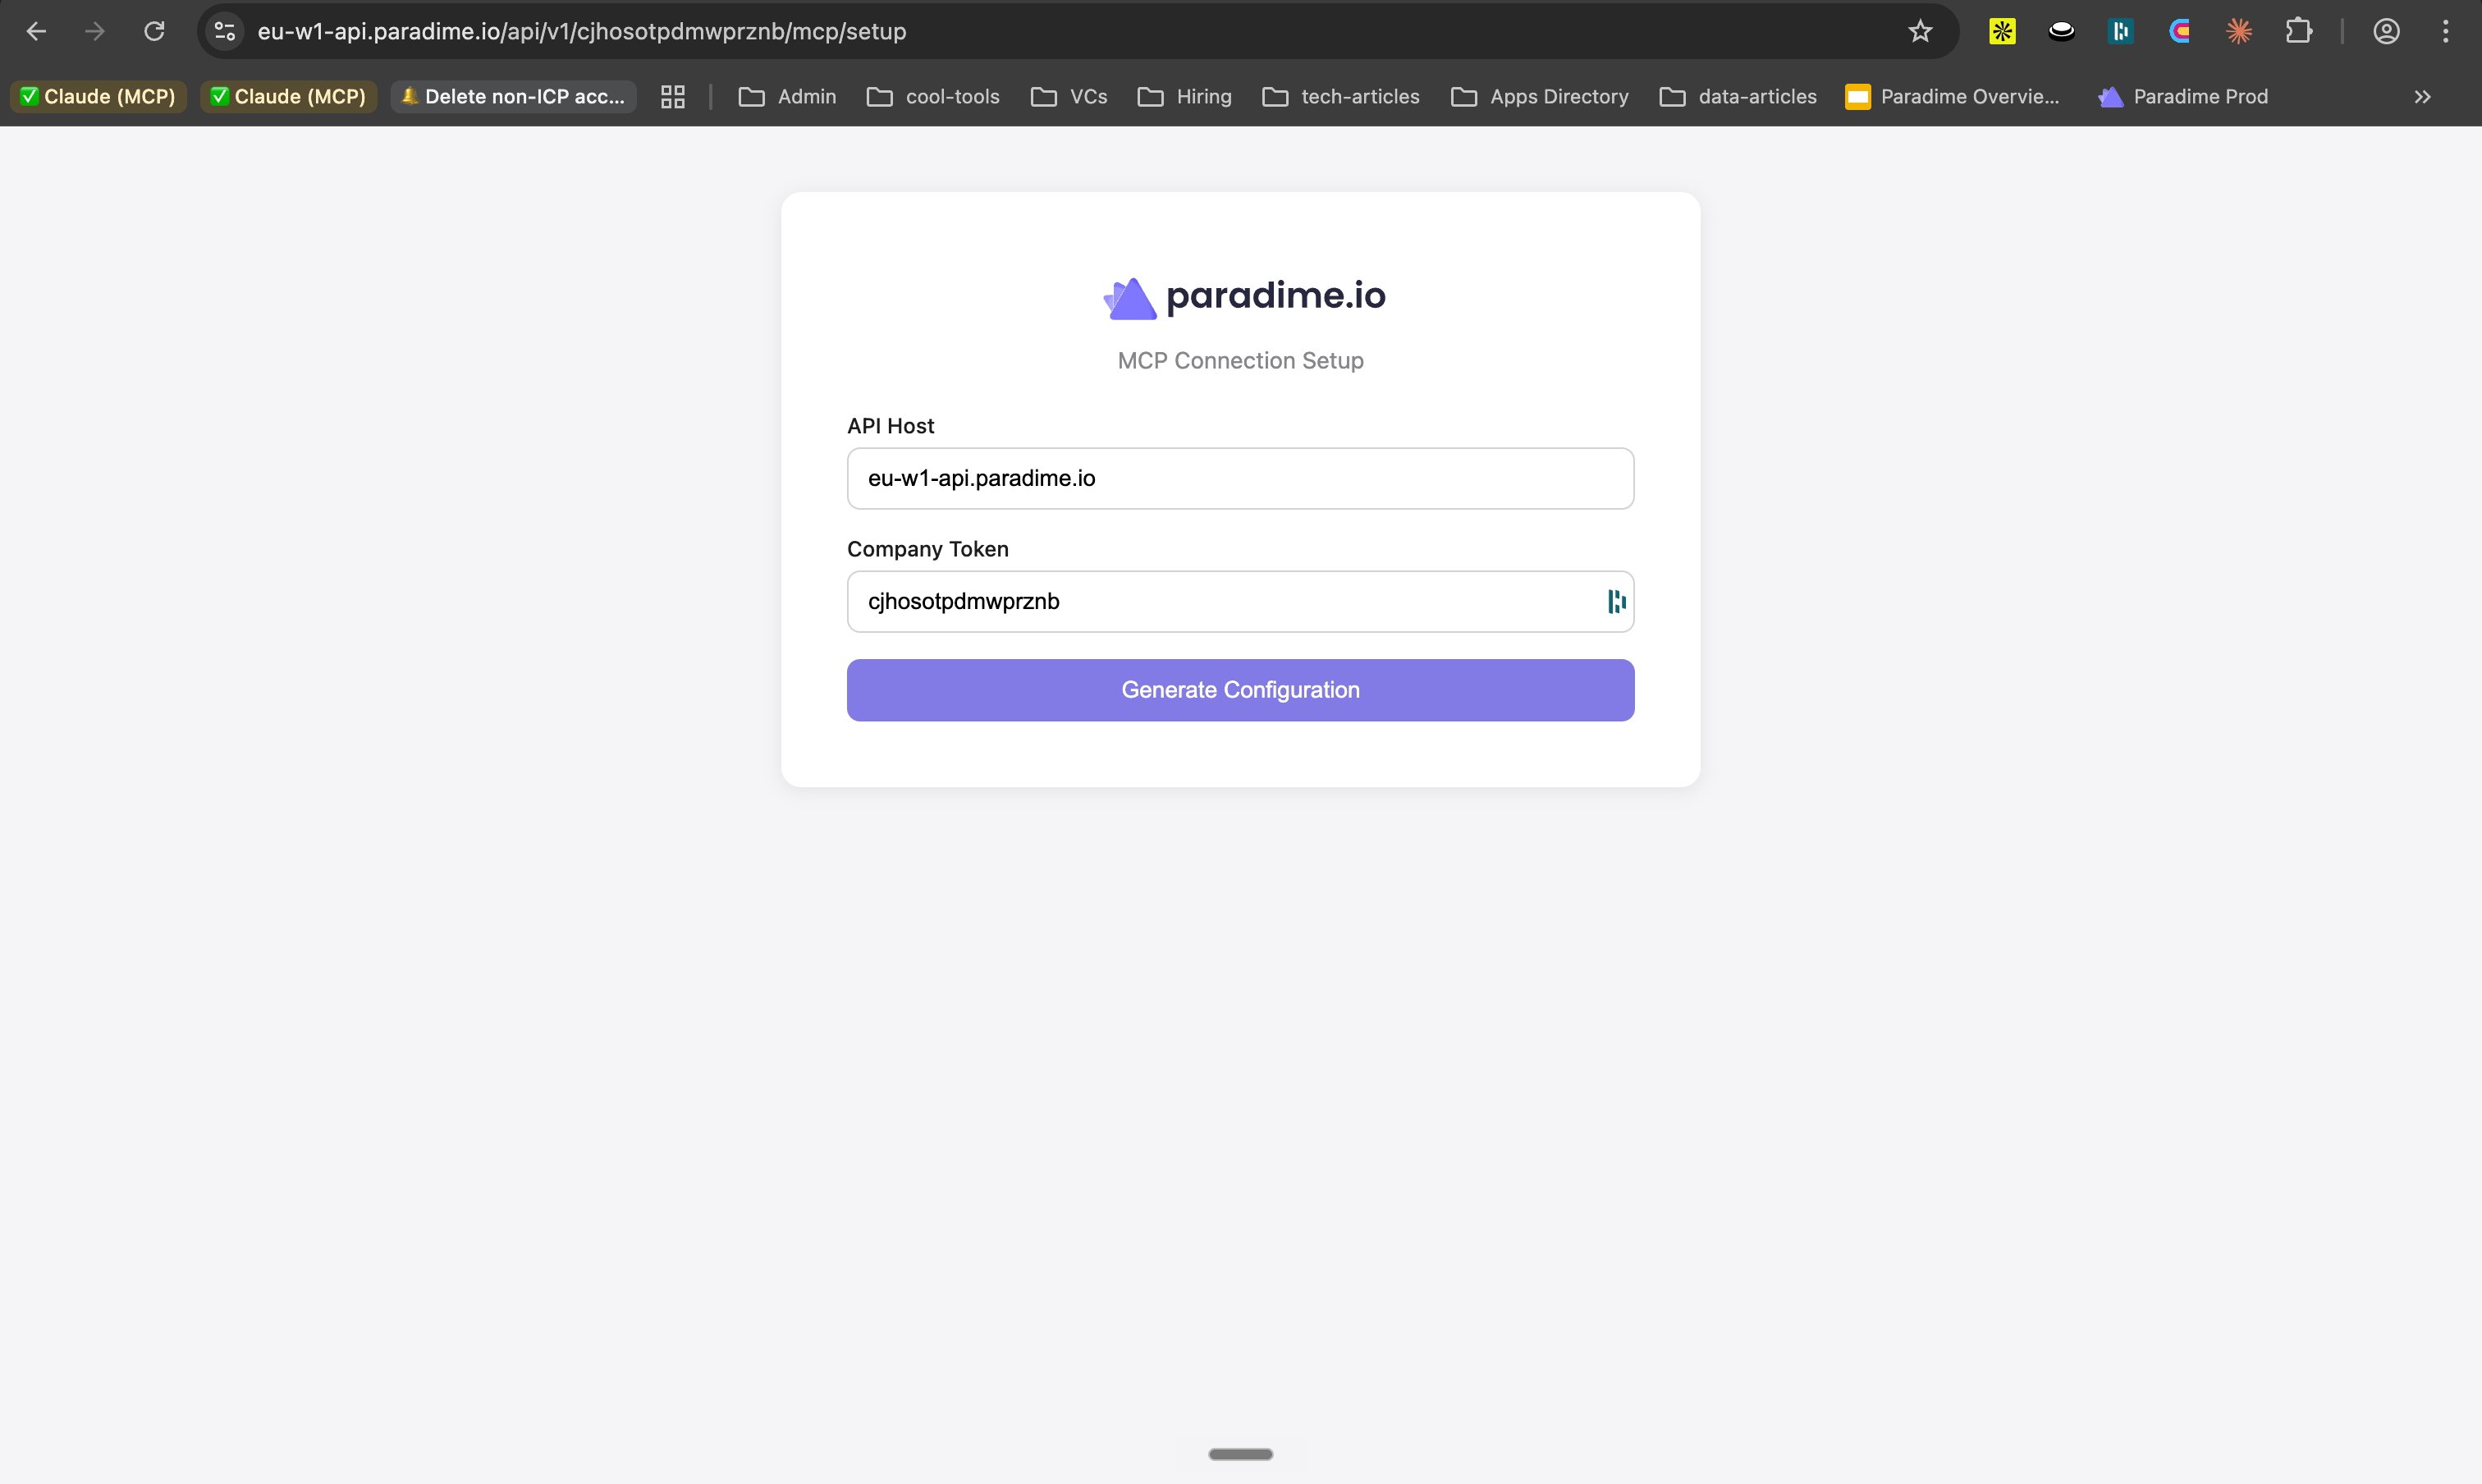 You will see all the generated details as follows:
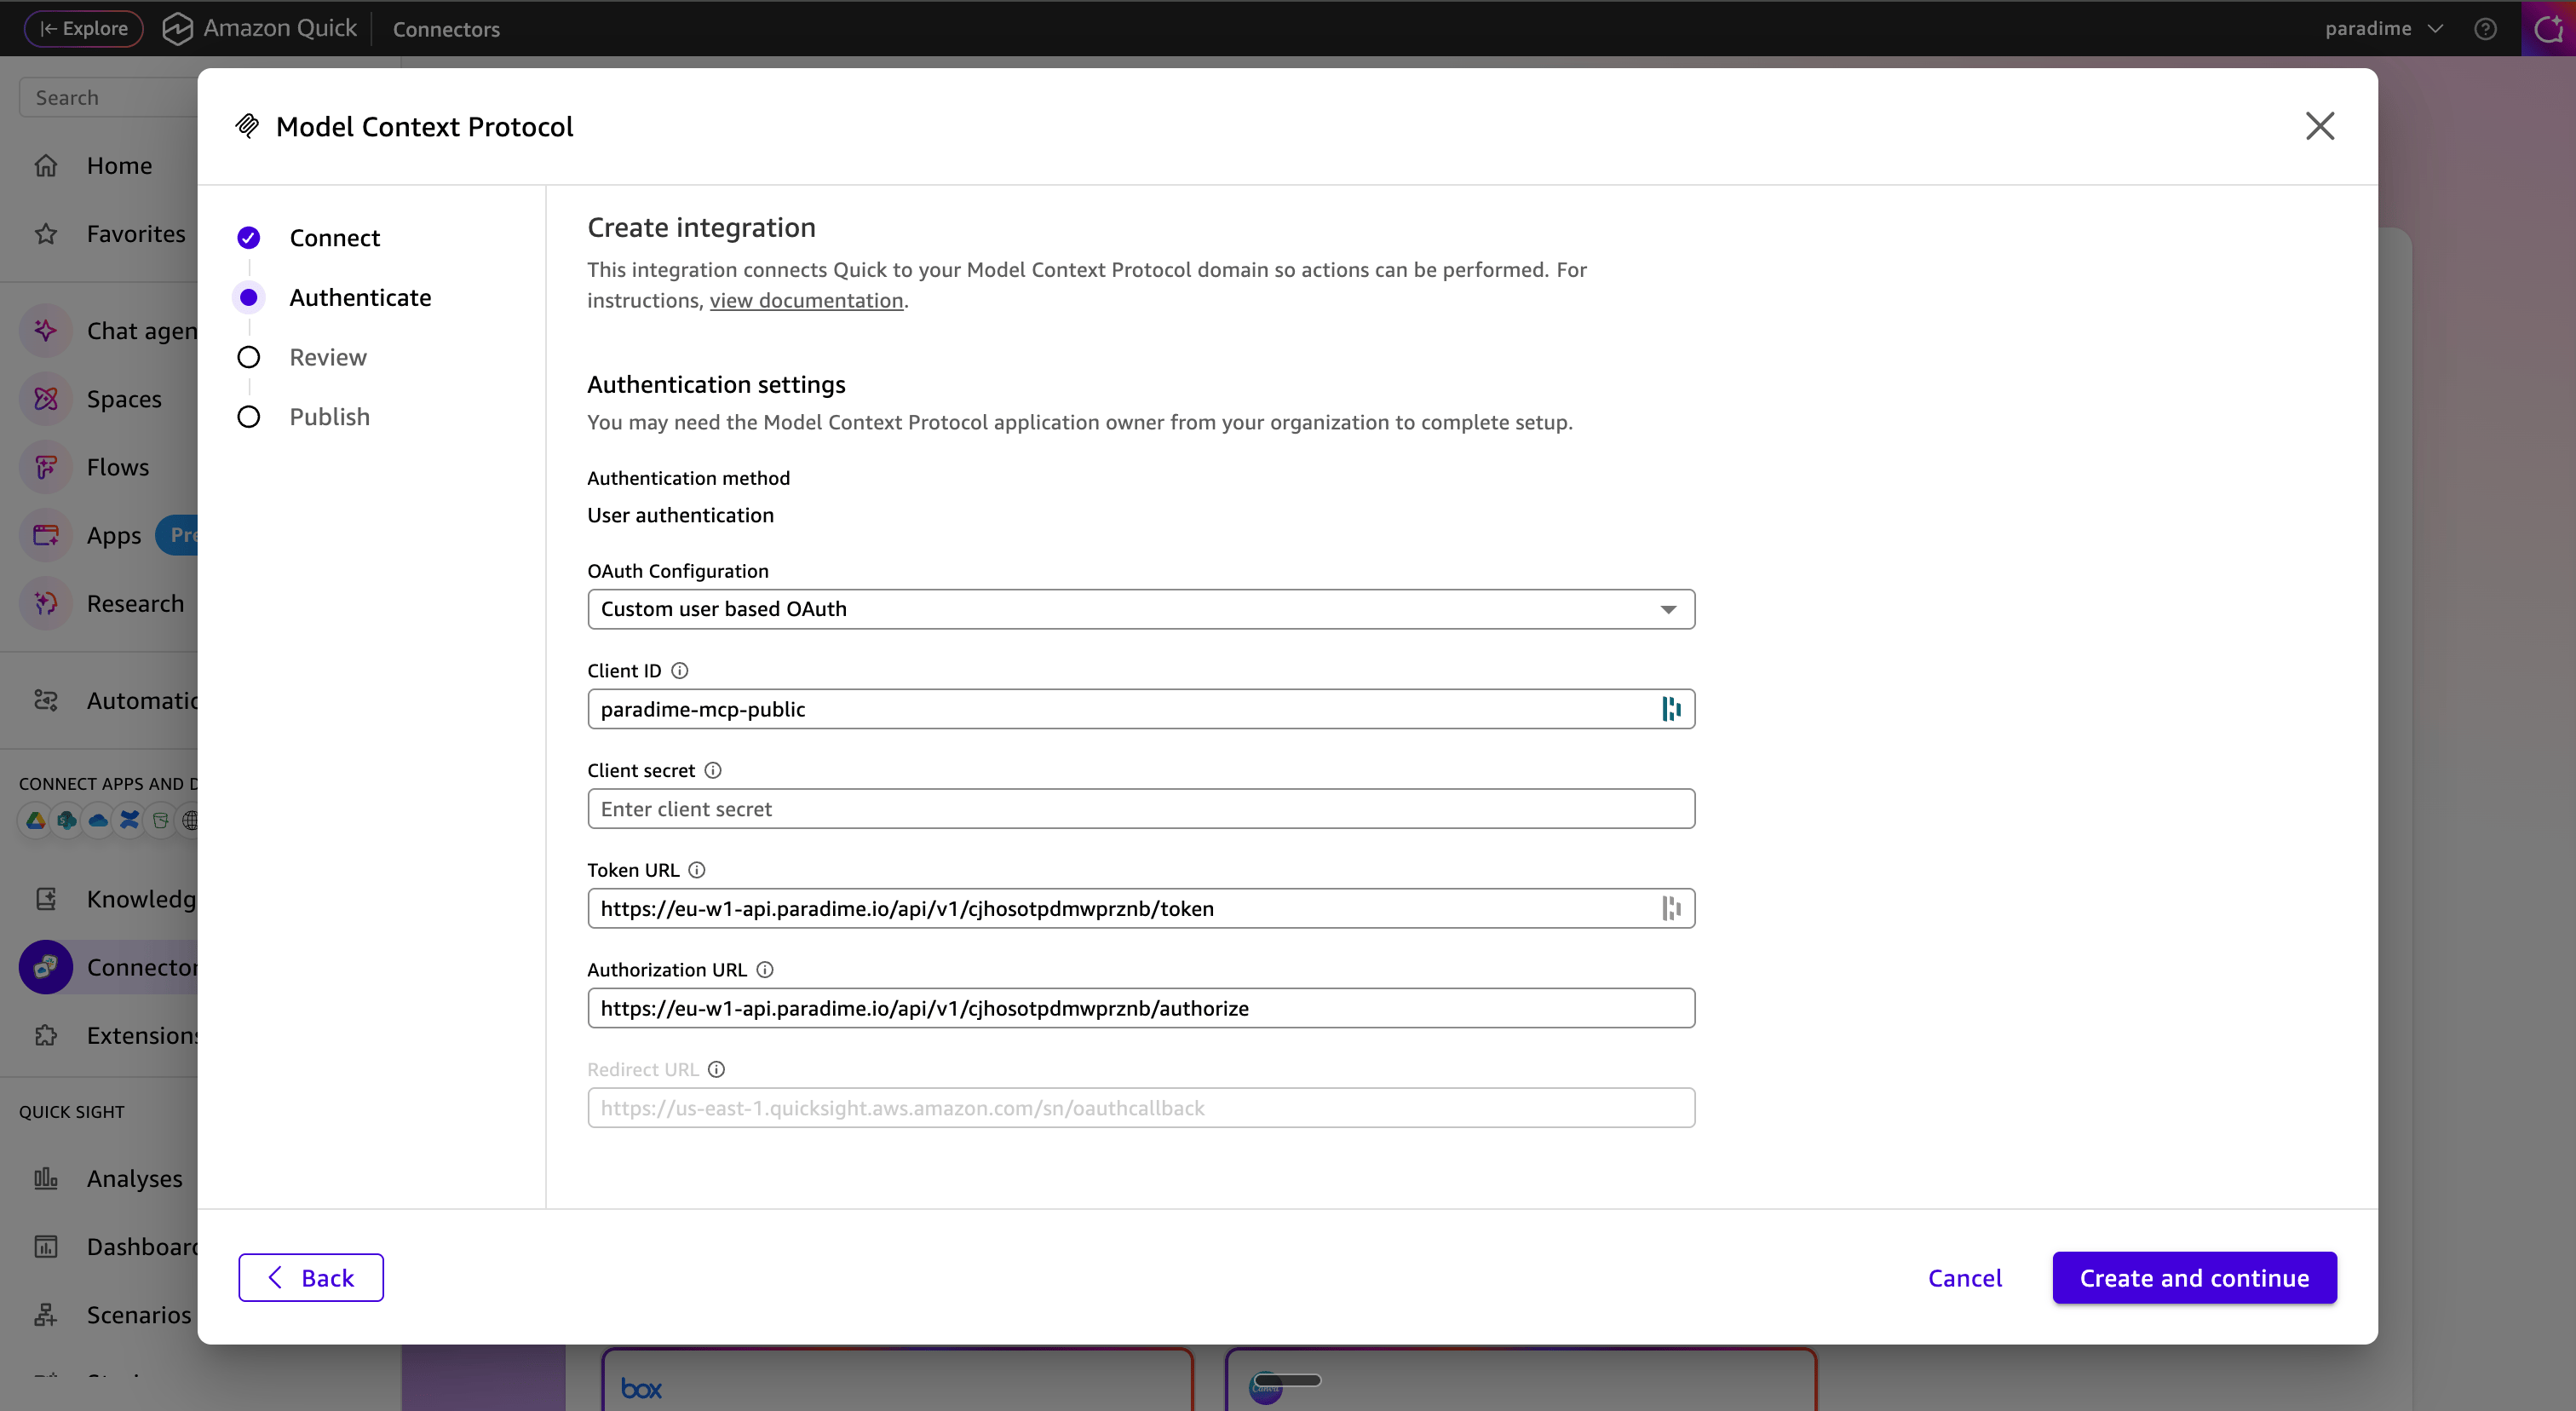
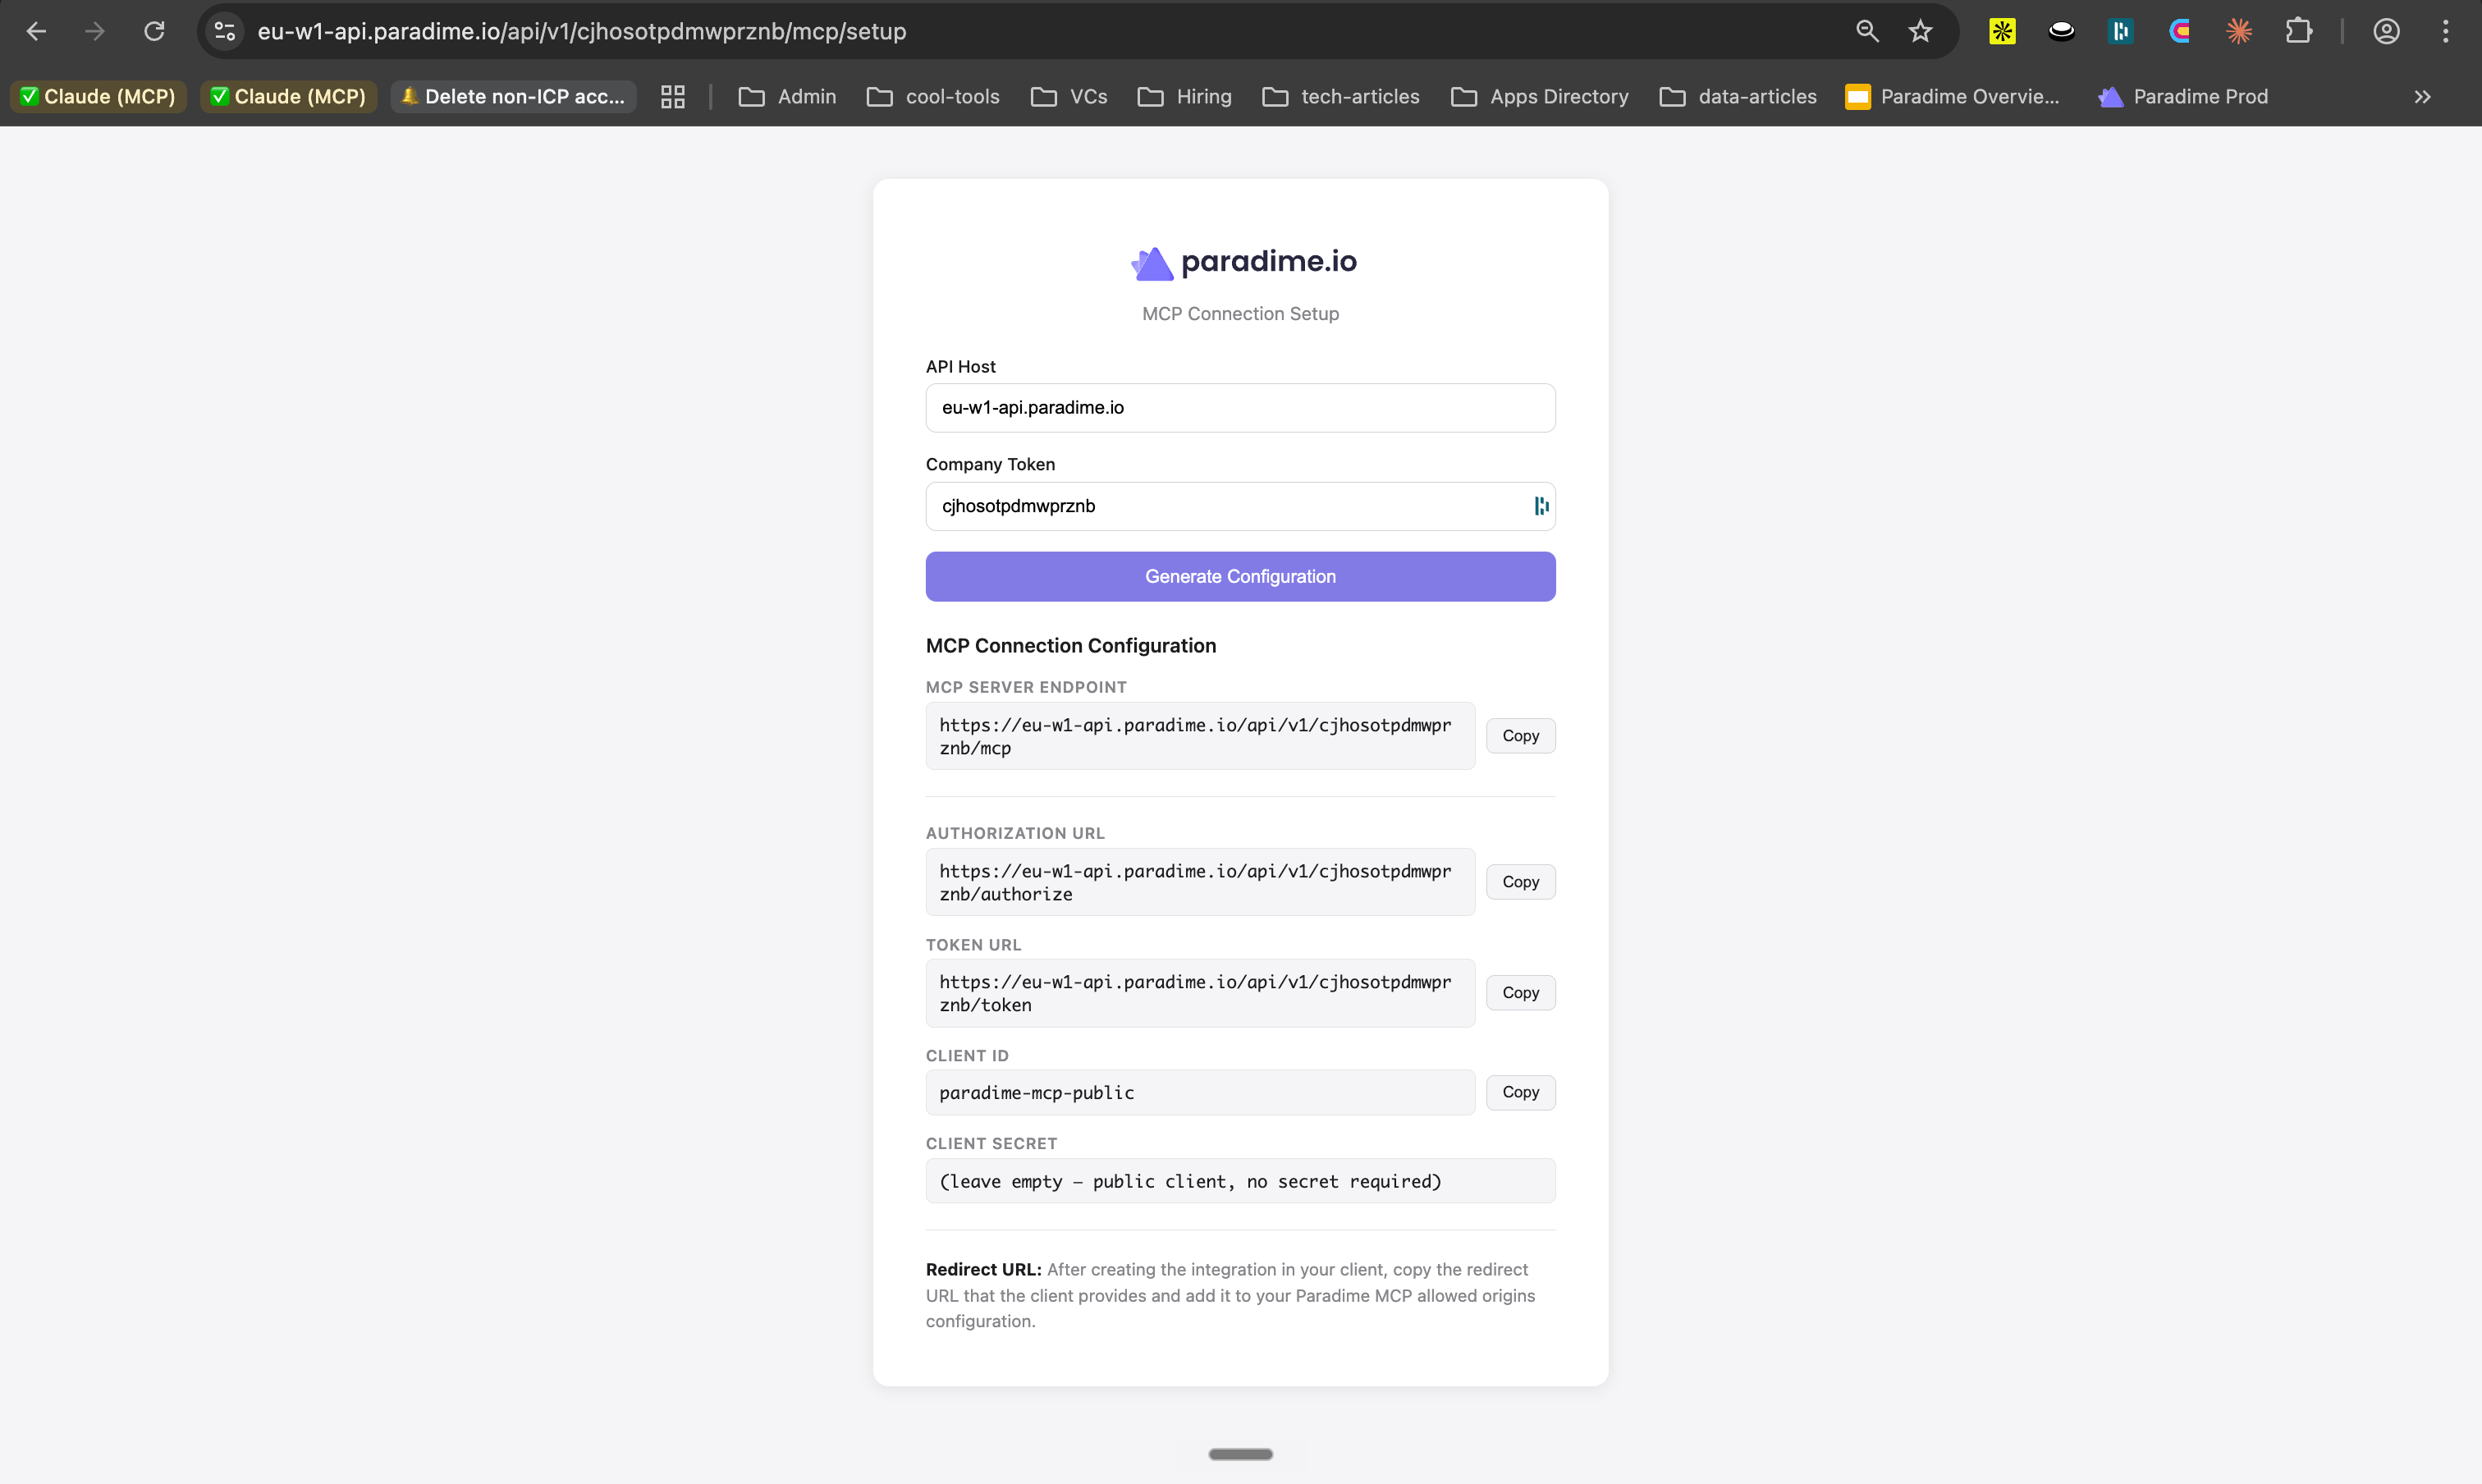 Enter the following details from the generated configuration as follows:
* **OAuth Configuration** - choose "Custom user based OAuth"
* **Client ID** - enter `paradime-mcp-public`
* Client Secret - leave it empty
* **Token Url** - copy the token url from the generated configuration
* **Authorization Url** - copy the authorization url from the generated configuration
Once you have entered the details, click **Create and continue**
Enter the following details from the generated configuration as follows:
* **OAuth Configuration** - choose "Custom user based OAuth"
* **Client ID** - enter `paradime-mcp-public`
* Client Secret - leave it empty
* **Token Url** - copy the token url from the generated configuration
* **Authorization Url** - copy the authorization url from the generated configuration
Once you have entered the details, click **Create and continue**
 #### Step 6 - Authenticate MCP with Paradime
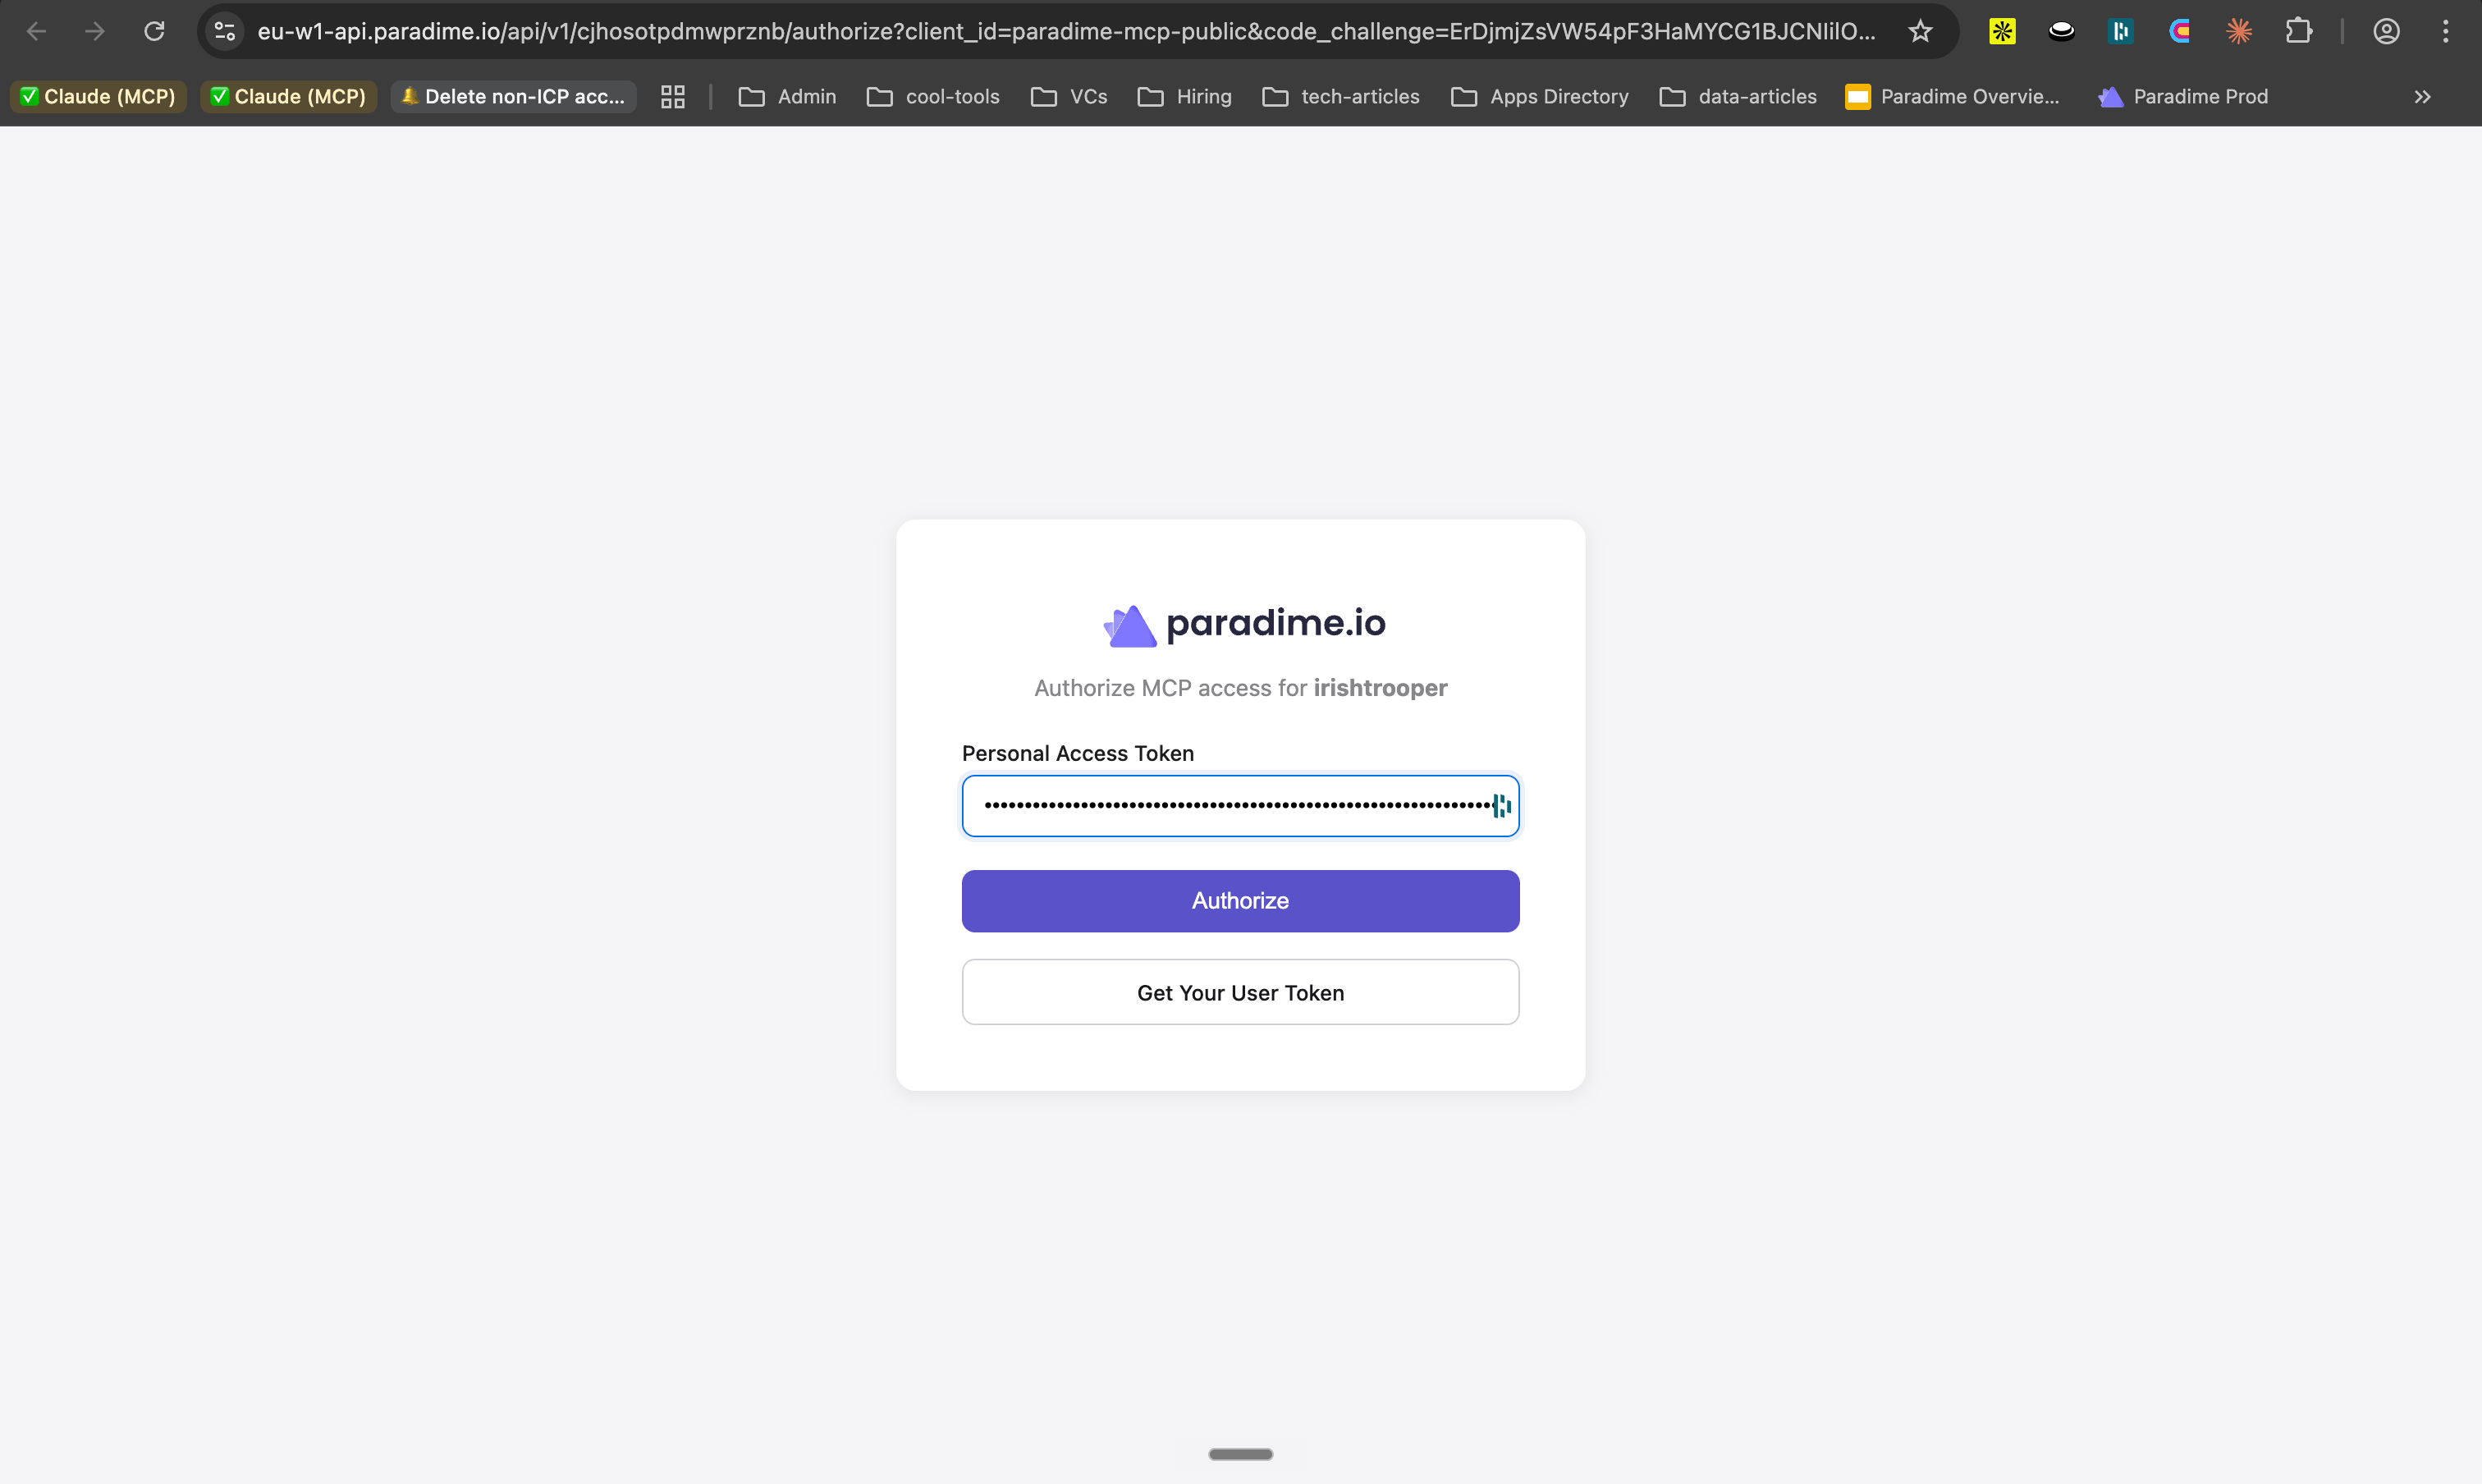
You will be redirected to the MCP authorization page on Paradime, where you will need to enter the MCP PAT token you saved from step 1 to authorize and then the connection will be complete.
#### Step 6 - Authenticate MCP with Paradime
You will be redirected to the MCP authorization page on Paradime, where you will need to enter the MCP PAT token you saved from step 1 to authorize and then the connection will be complete.
 #### Step 7 - Connection Complete
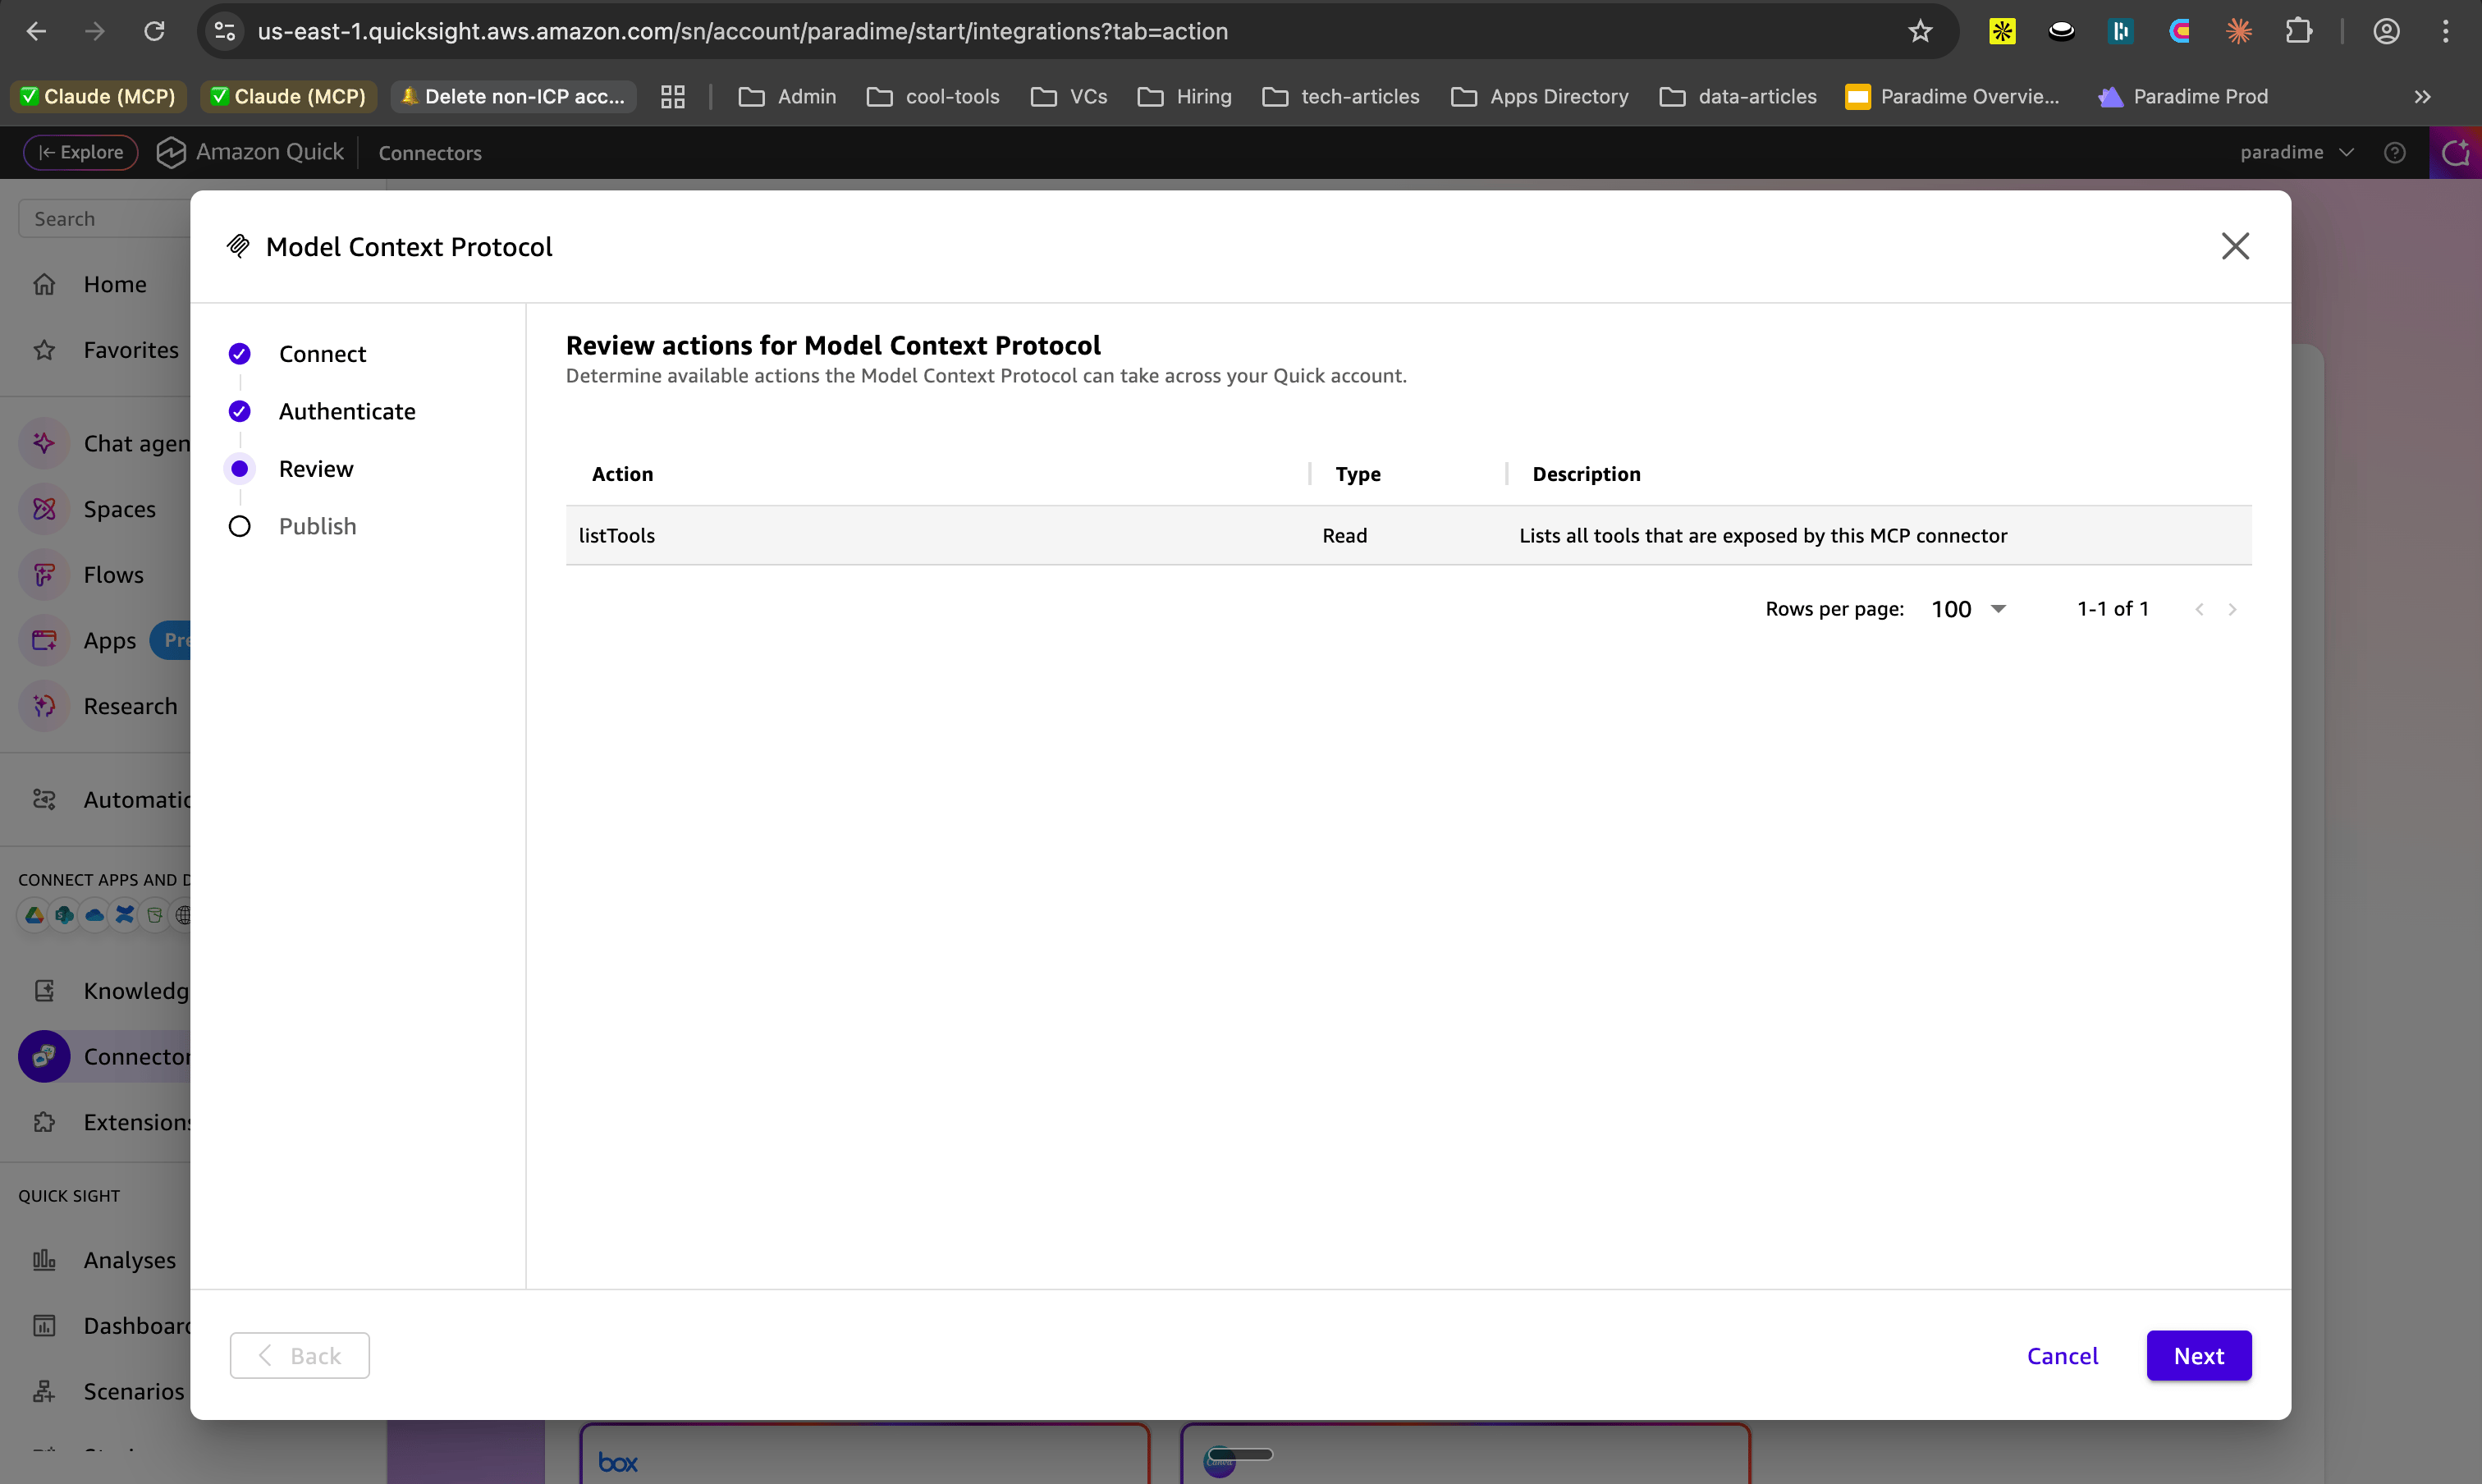
If Step 6 was successful, you will be redirected back to Amazon Quick and you will see the following screen and click **Next** to finish.
#### Step 7 - Connection Complete
If Step 6 was successful, you will be redirected back to Amazon Quick and you will see the following screen and click **Next** to finish.
 #### Step 8 - Verify MCP Tools
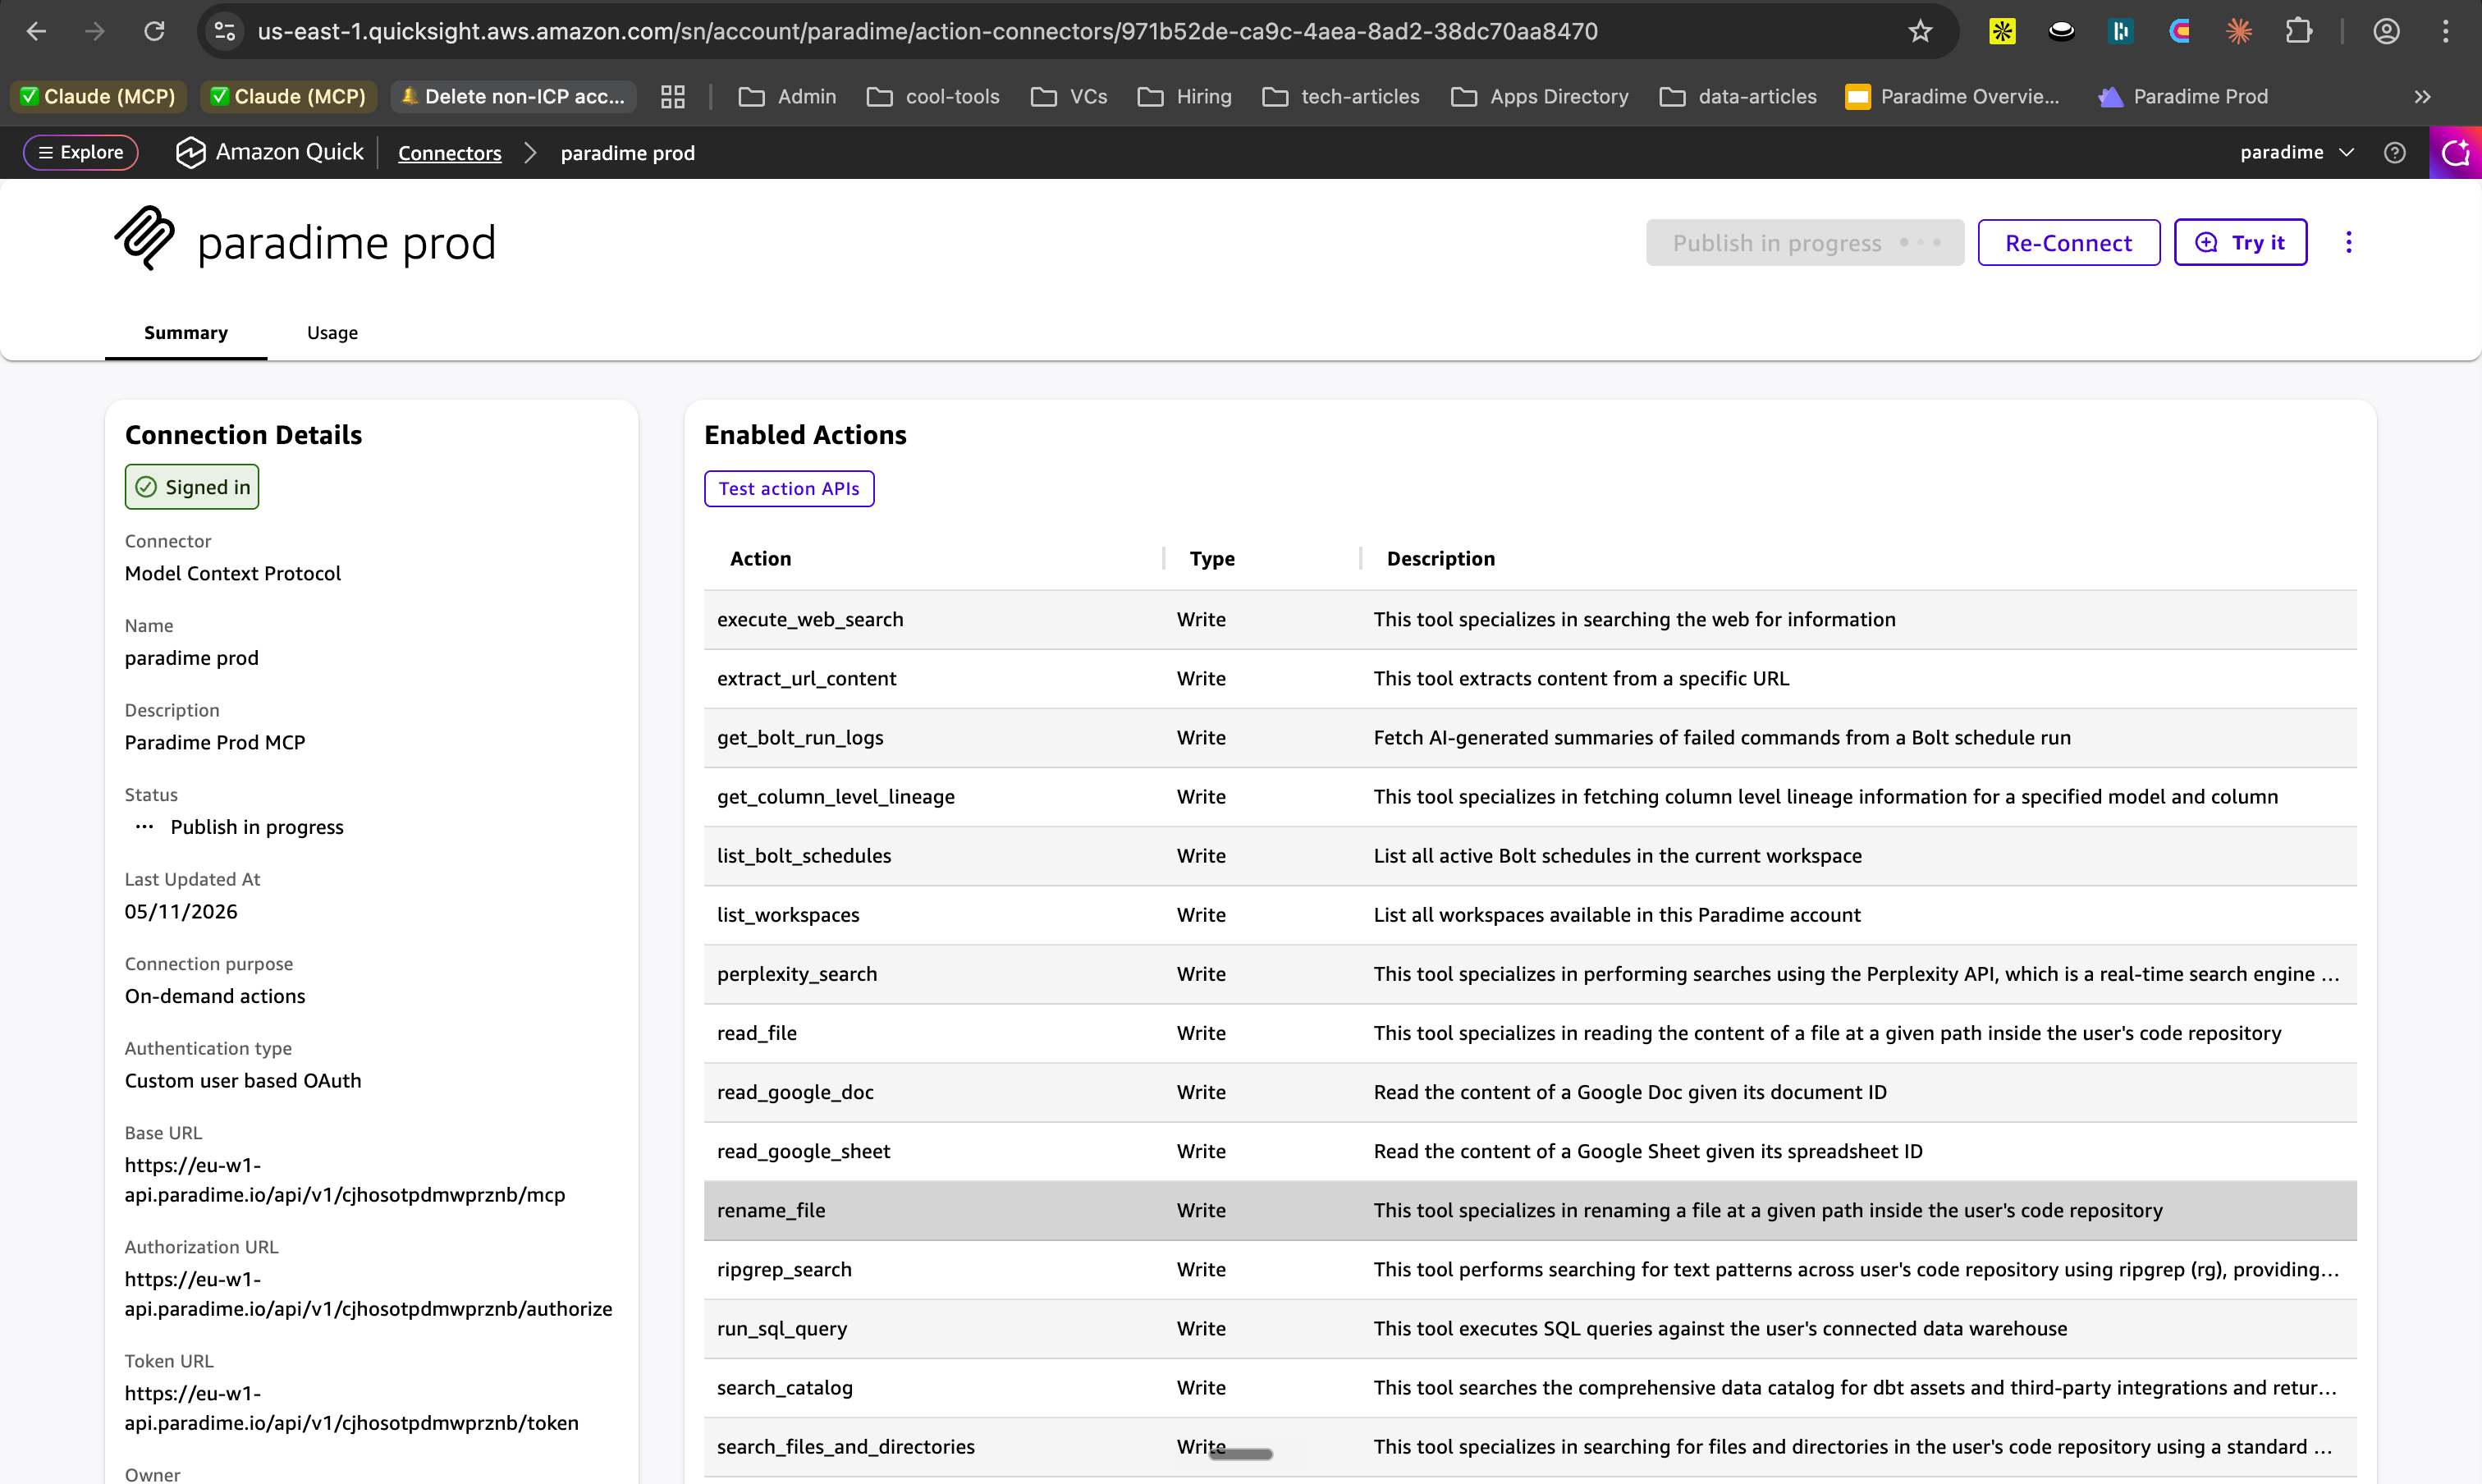
Once everything is done, you can go to Connectors > Search "paradime", and you should see the Paradime MCP connector. Click on it and you will find all the tools available for the MCP.
#### Step 8 - Verify MCP Tools
Once everything is done, you can go to Connectors > Search "paradime", and you should see the Paradime MCP connector. Click on it and you will find all the tools available for the MCP.
 ## Related topics
- [Amazon Athena](/products/settings/connections/dinoai-background-agent-environment/amazon-athena.md)
- [Amazon S3](/integrations/amazon-s3.md)
- [Quick Start](/products/dino-ai/programmable-agents/quick-start.md)
## Related topics
- [Amazon Athena](/products/settings/connections/dinoai-background-agent-environment/amazon-athena.md)
- [Amazon S3](/integrations/amazon-s3.md)
- [Quick Start](/products/dino-ai/programmable-agents/quick-start.md)