

1. Snowflake setup guide
Create a Snowflake role and user
Generate a password for the Paradime user and replace the placeholder text
<your_generated_password_here> in the step below.Create a Snowflake warehouse
Create S3 integration
Before running this command, you will need to update
STORAGE_AWS_ROLE_ARN and STORAGE_ALLOWED_LOCATIONS with your own region and company token.You can find the region and company token in the Paradime workspace settings page. company-and-workspace-token.mdIf you have set
Before running this command, you will need to update
PREVENT_UNLOAD_TO_INLINE_URL to true, you can optionally use a named stage. To set this up run the below script. Before running this command, you will need to update
URL with your own region and company token. You can find the region and company token in the Paradime workspace settings page. company-and-workspace-token.mdCreate a new database and schema for Paradime
Create a new Snowflake file format
Grant access to Snowflake metadata to the Paradime user
Enable the Paradime user to manage and monitor Snowflake Warehouses
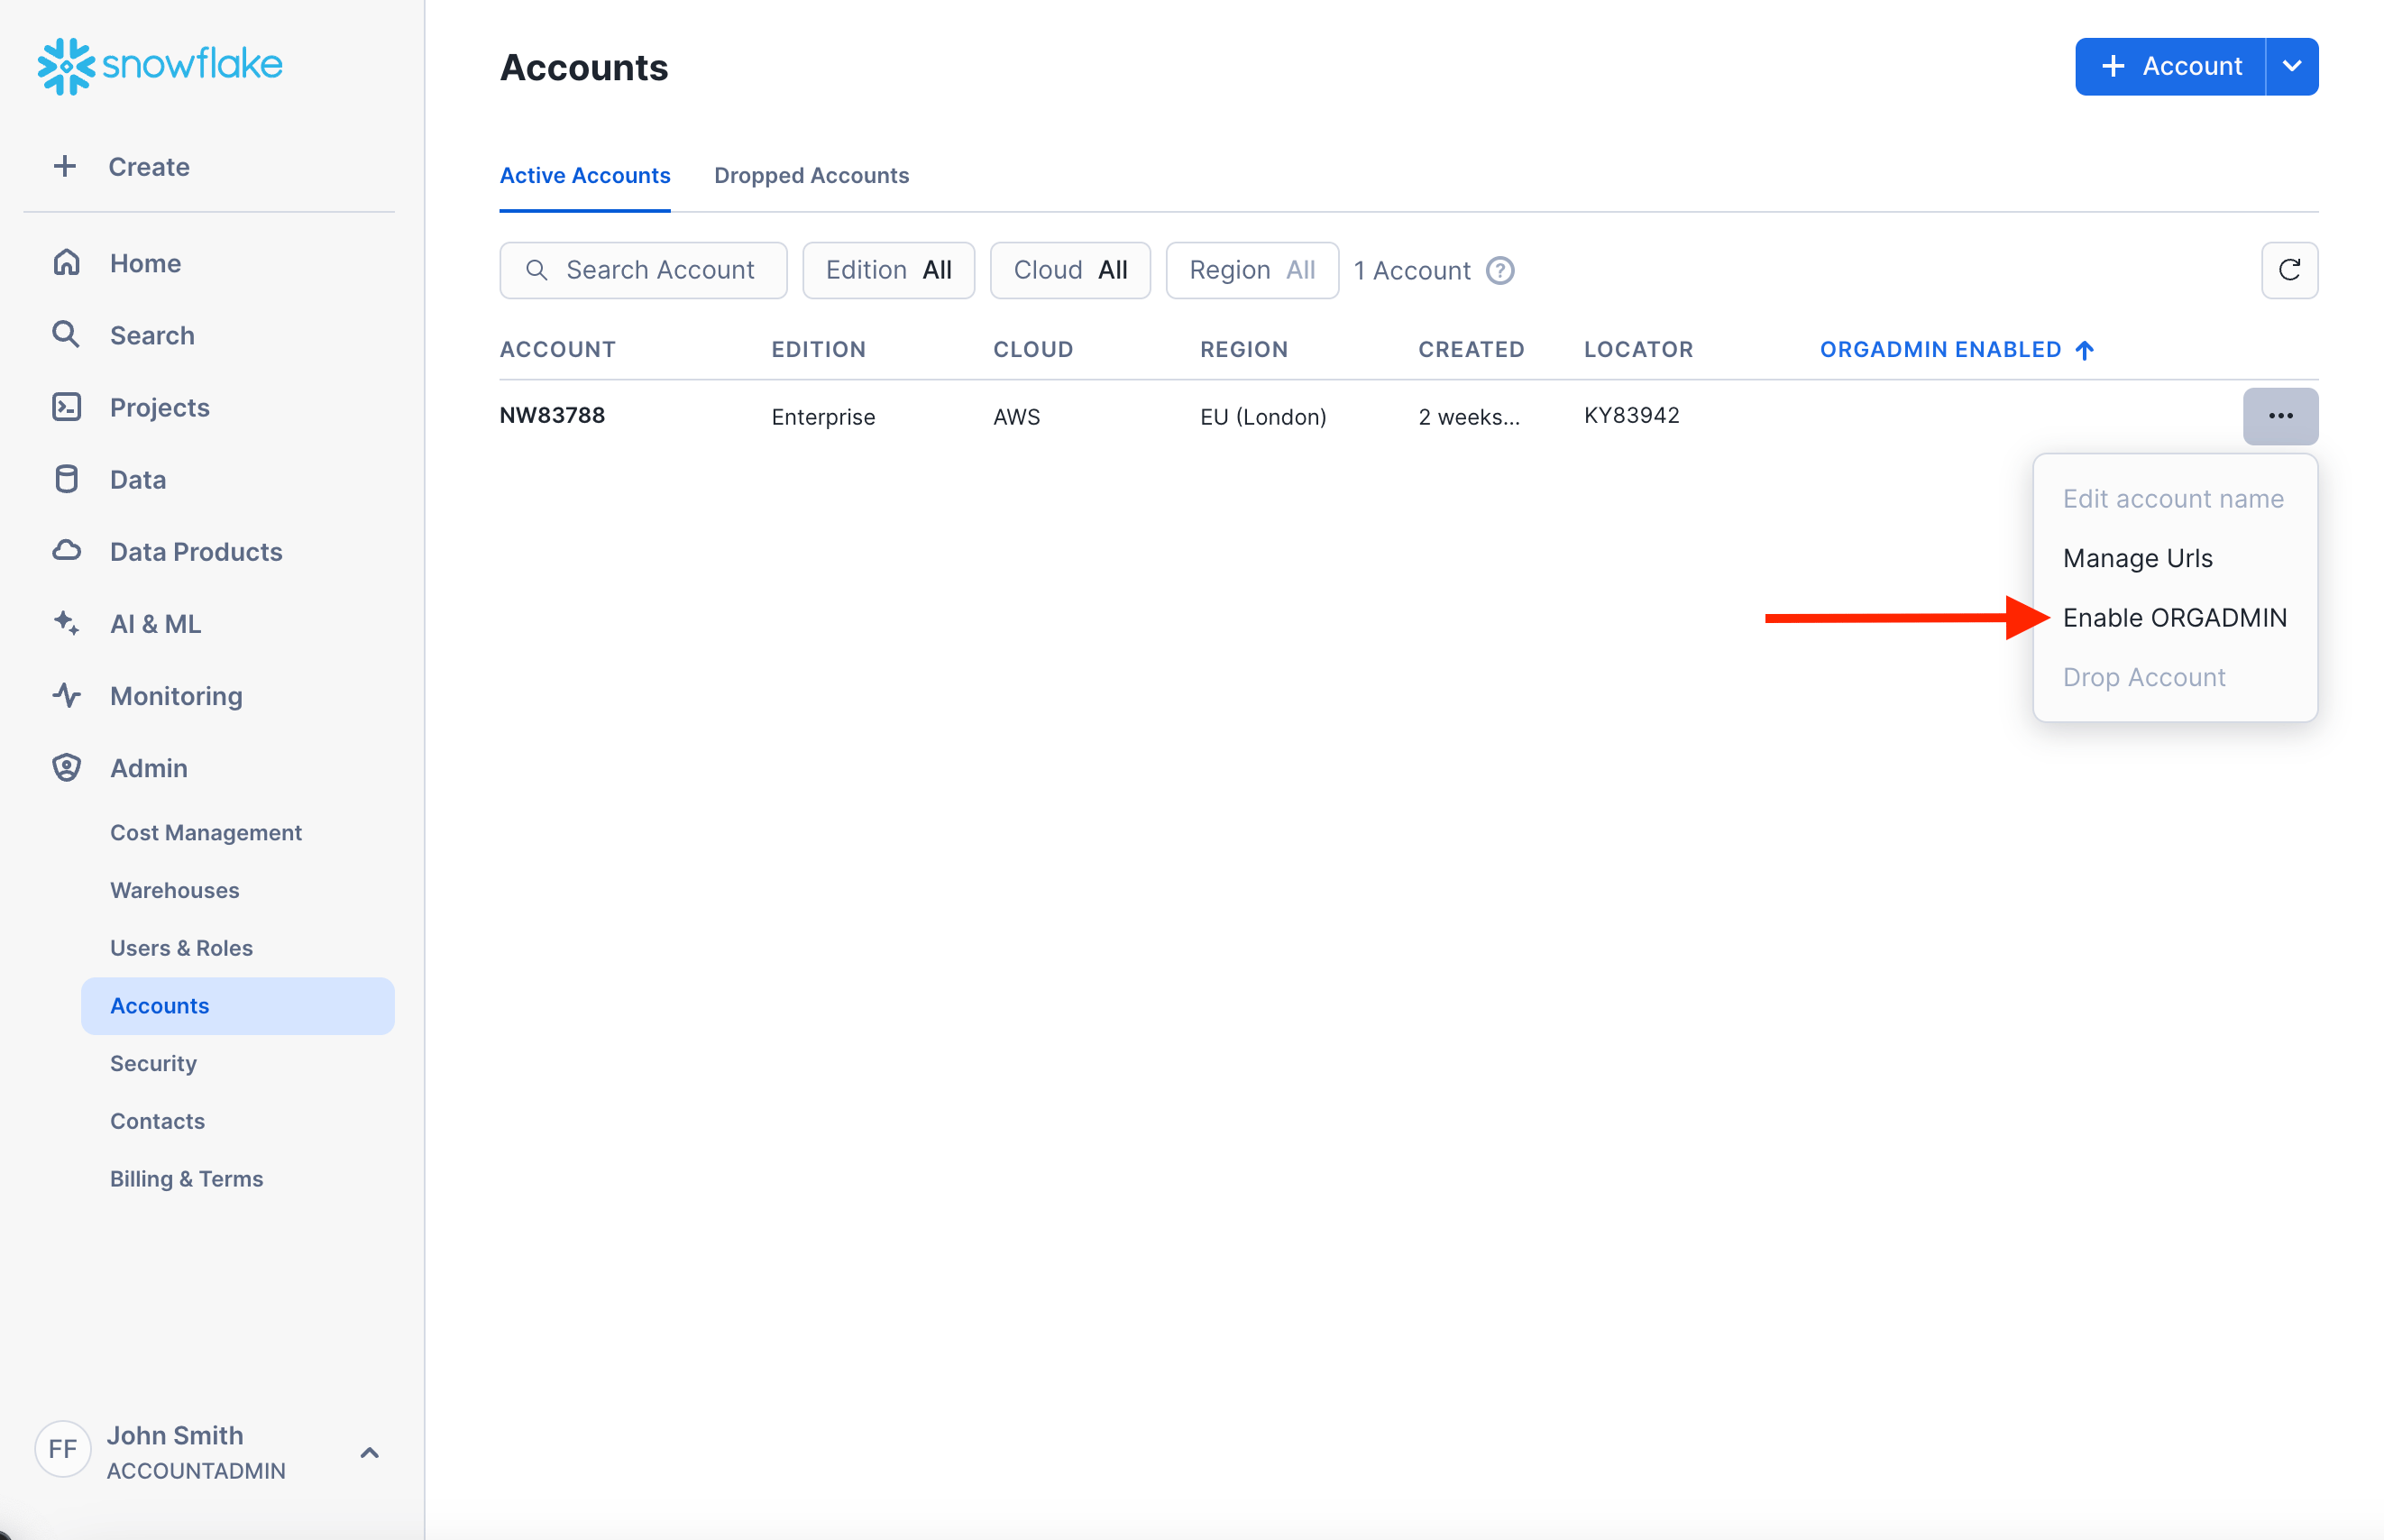
Ensure your account has ORGADMIN access
Paradime relies on views from thesnowflake.organization_usage such as the snowflake.organization_usage.rate_sheet_daily view is used to retrieve your daily rate for each Snowflake service (example the cost per credit for compute resources and cost per terabyte for storage).
To verify if these views are populated in your account, please execute the following SQL statement:
If records are returned, you’re all set 🙌-------If the SQL statement returns no records, it likely means that the ORGADMIN role is not enabled for the account. To enable it, follow these steps:
- Log into a Snowflake account within your organization that has the ORGADMIN role enabled (at least one account should have this role).
- Navigate to the sidebar and click on “Admin” and then “Accounts”.
- Locate the account you want to connect to Paradime enable the ORGADMIN role for that account.
Purchased your Snowflake credits through a reseller?
Full script here 👇
Snowflake setup guide script
Snowflake setup guide script
lineNumbers
2. dbt™️ project setup guide
Create a macro to manage query comments
To enable Paradime to enrich your Snowflake queries with additional metadata you will need to create a new dbt™️ macro calledget_query_comment.sql in the macros folder of your project.
get_query_comment.sql dbt™️ macro
get_query_comment.sql dbt™️ macro
get_query_comment.sql
Update your dbt_project.yml file
This step ensures that with each dbt™️ run, the query comment is appended to the query running in Snowflake.dbt_project.yml
3. Configured Cost connection in Paradime
Add a Snowflake Cost Connection
- Click “Settings” in the top menu bar of the Paradime interface.
- Click “Connections” in the left sidebar.
- Click “Add New” next to the Radar Environment.
- Select “Snowflake” as the connection type.
Step 2: Enter the Required Credentials
After selecting Snowflake, provide the following details:- Snowflake Account Identifier
- Paradime Cost Database:
PARADIME_COST_ANALYTICS
- Key-Pair
- Username & Password
Check this guide on generating an encrypted or unencrypted key pair for the Snowflake user connecting to Paradime.
- Username:
paradime_cost_user - Private Key: The Private Key generated and linked to the user. You must include the commented lines when adding the Private Key.
- Passphrase (Optional): (Use the passphrase created when generating the encrypted)