

What you can do
Catalog & Lineage
Lightdash assets appear in Paradime’s catalog and lineage, so you can trace dbt™ models through to the metrics built on them.
Orchestration
Develop metrics with the Lightdash CLI in the Code IDE and deploy dbt™ project changes to Lightdash from a Bolt schedule.
Prerequisites
Development setup
Authenticating with Lightdash
- In the Code IDE, open the Paradime Integrated Terminal
- Follow Lightdash documentation and run authentication commands.
- Follow the prompts to complete authentication
Using the Lightdash CLI
The Lightdash CLI in Paradime enables you to:- Autogenerate Lightdash-ready YAML files
- Preview metrics before deployment
- Deploy changes to your Lightdash instance
Orchestration
Enable automatic deployment of your dbt™ project changes to Lightdash using Paradime Bolt schedules. For the full set of Bolt commands, see Lightdash commands.Step 1: Configure Lightdash credentials
- From any page in Paradime, Click Settings
- Navigate to Workspaces > Environment Variables
- In the Bolt Schedules section, click Add New
- Configure each required variable:
LIGHTDASH_API_KEY: Personal access tokenLIGHTDASH_PROJECT: Project UUIDLIGHTDASH_URL: Instance URL
Finding your Lightdash credentials
Finding your Lightdash credentials
LIGHTDASH_API_KEY
Settings > Personal Access Tokens. This is the token you’ll put in for LIGHTDASH_API_KEY.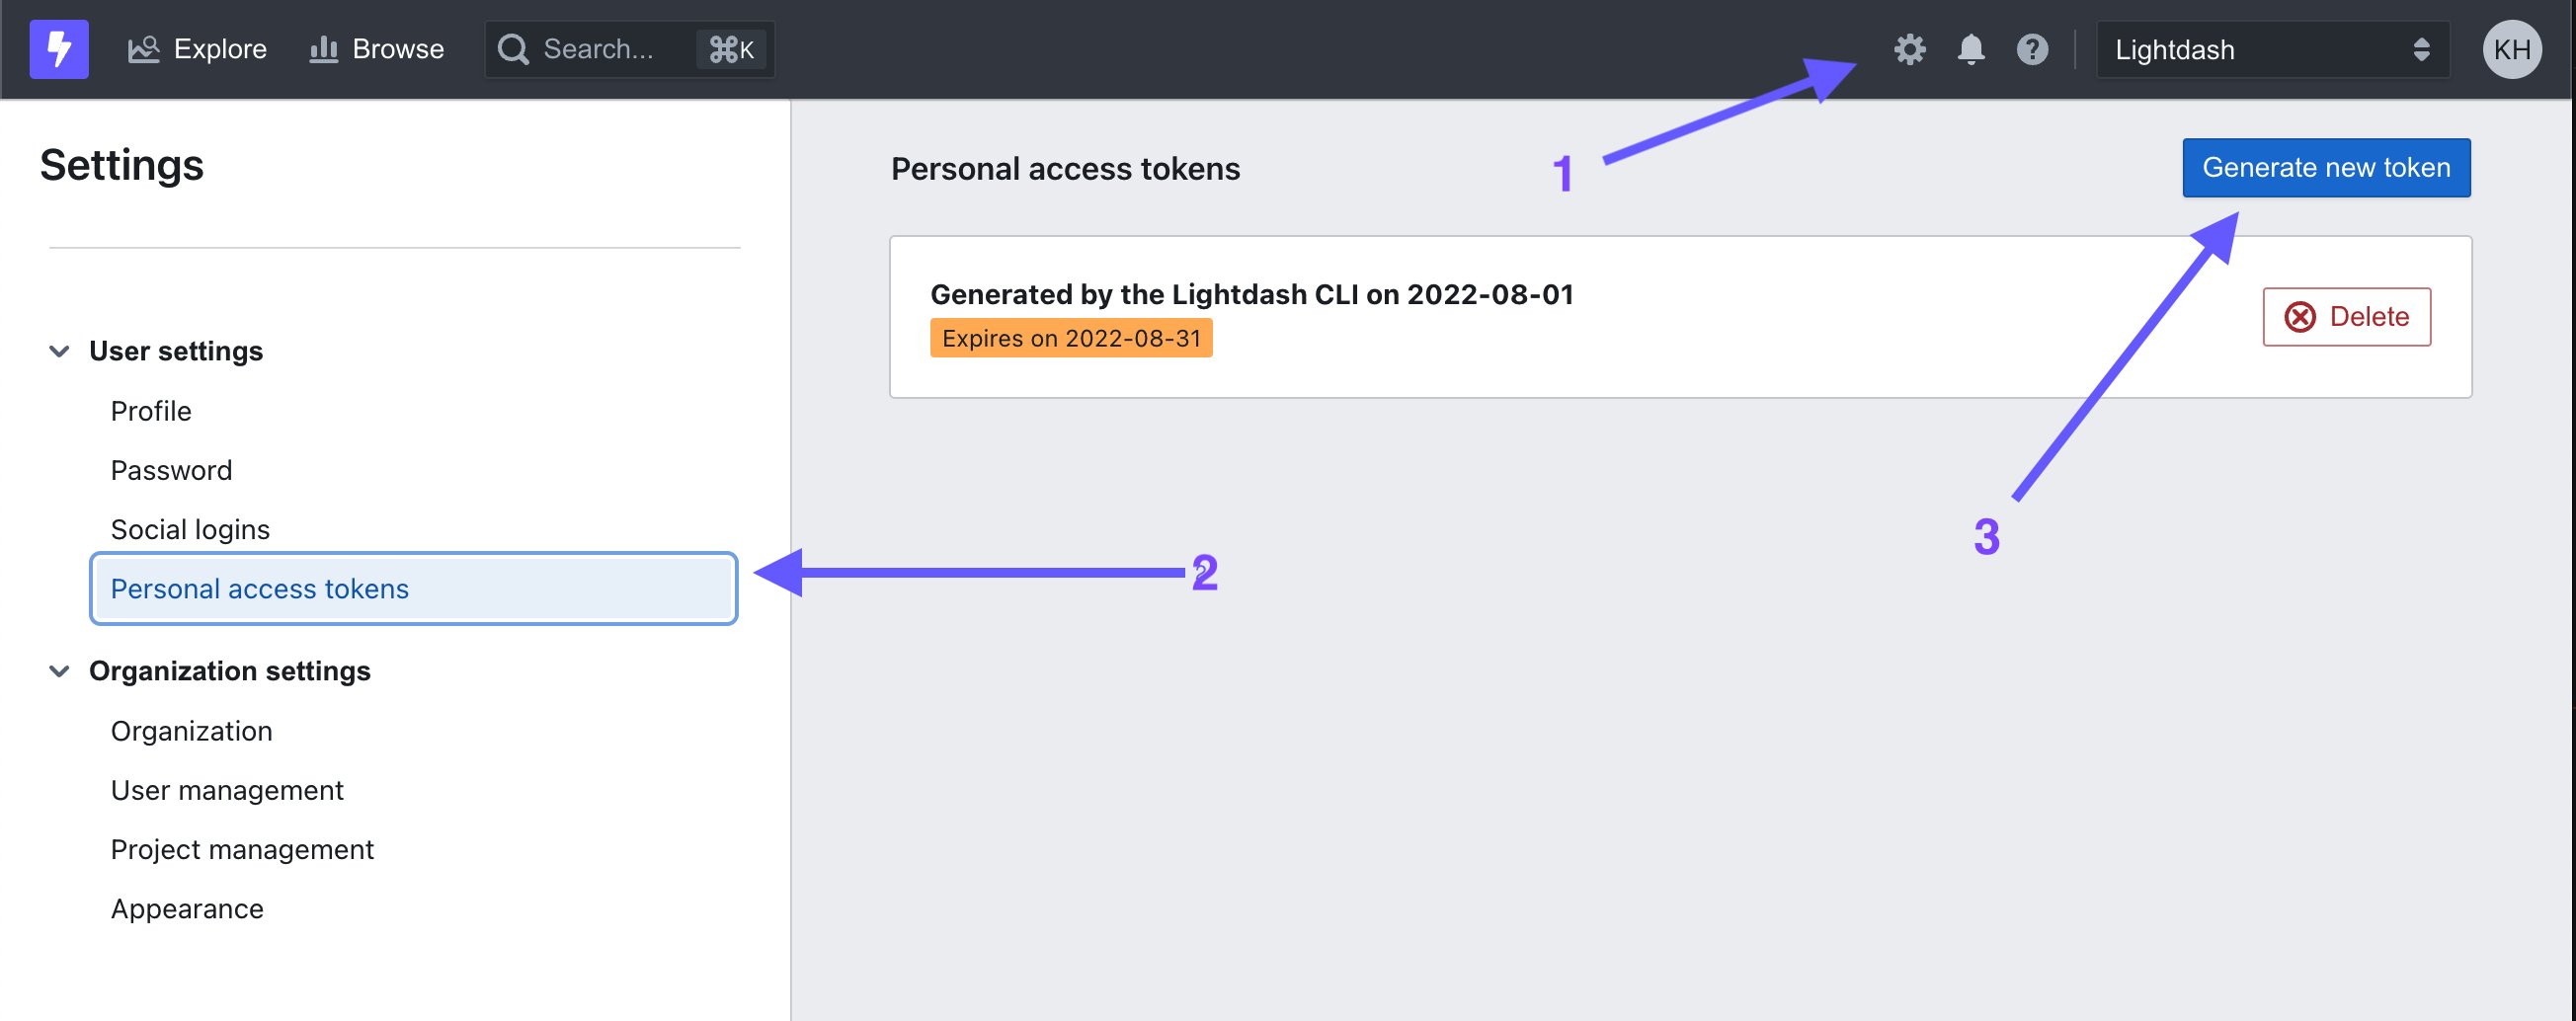
LIGHTDASH_PROJECT
https://eu1.lightdash.cloud/projects/3538ab33-dc90-aabb-bc00-e50bba3a5f69/tables, then 3538ab33-dc90-45f0-aabb-e50bba3a5f69 is your LIGHTDASH_PROJECTLIGHTDASH_URL
https://eu1.lightdash.cloud or https://app.lightdash.cloud (check the URL to your Lightdash project)Step 2: Configure deployment schedule
- Create or edit a Bolt schedule
- Add the
lightdash deploycommand - This will:
- Execute after your dbt™ commands complete
- Deploy changes to your Lightdash project
- Keep metrics in sync with your dbt™ project
You can configure this as part of a CD schedule to deploy changes automatically after PR merges.